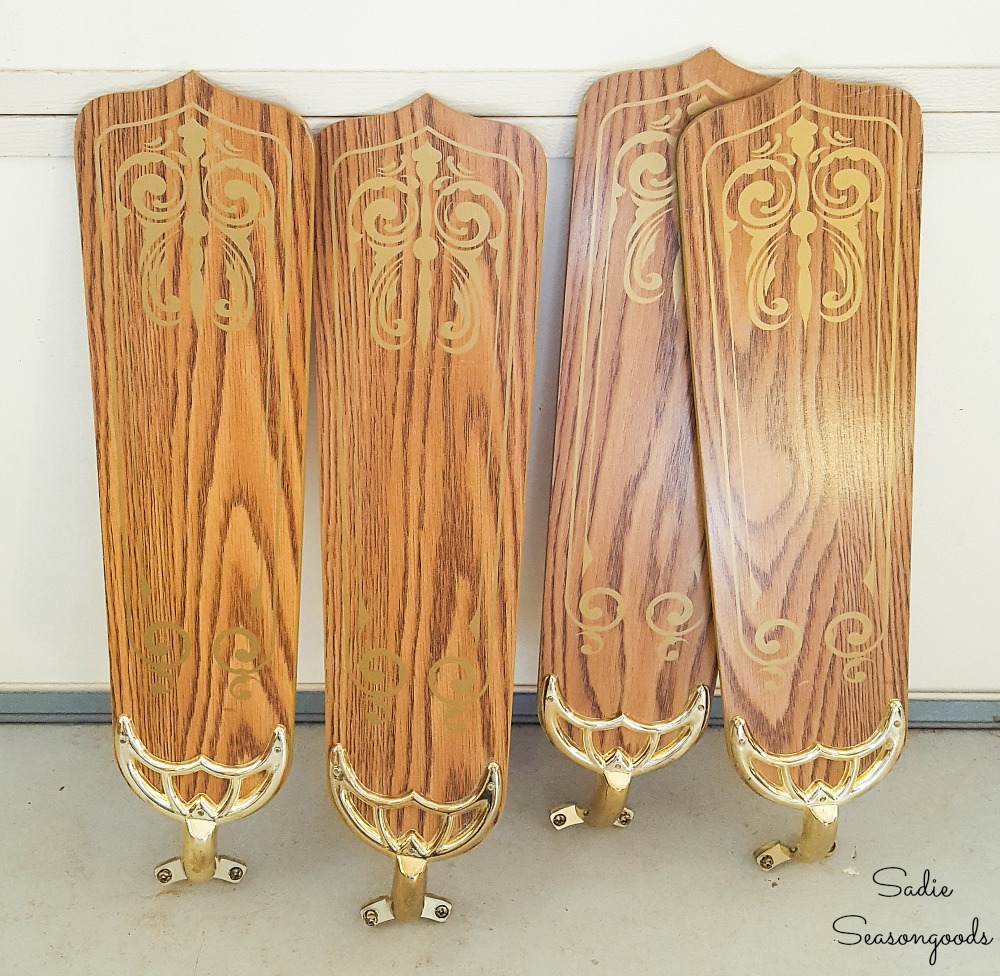
Mr. Seasongoods and I are slowly (and I mean SLOWLY) giving our home office a face lift. The first order of business was replacing the outdated squeaky ceiling fan. And when we did so, I saved the ceiling fan blades for a project- of course! I had this idea for transforming them into windmill decor or a half windmill wall decor.
My crazy idea stemmed from the show Fixer Upper, which many of you are likely familiar with. Joanna Gaines (one of the main stars) would periodically use salvaged windmills in her farmhouse decor.
And I *do* love me some farmhouse decor, ESPECIALLY if its upcycled!
But then I looked them up online, they were OUTRAGEOUSLY priced. And also- HUGE. I have a small budget and a small house, but what if I could upcycle these fan blades into windmill wall decor?
Crazy idea? Or just crazy enough to work? Let’s find out…
This post contains affiliate links for your crafting convenience. As an Amazon Associate, I earn from qualifying purchases. All blue, bold, and underlined text is a clickable link, either to a product or to a related post.
Designing the Windmill Decor with Fan Blades
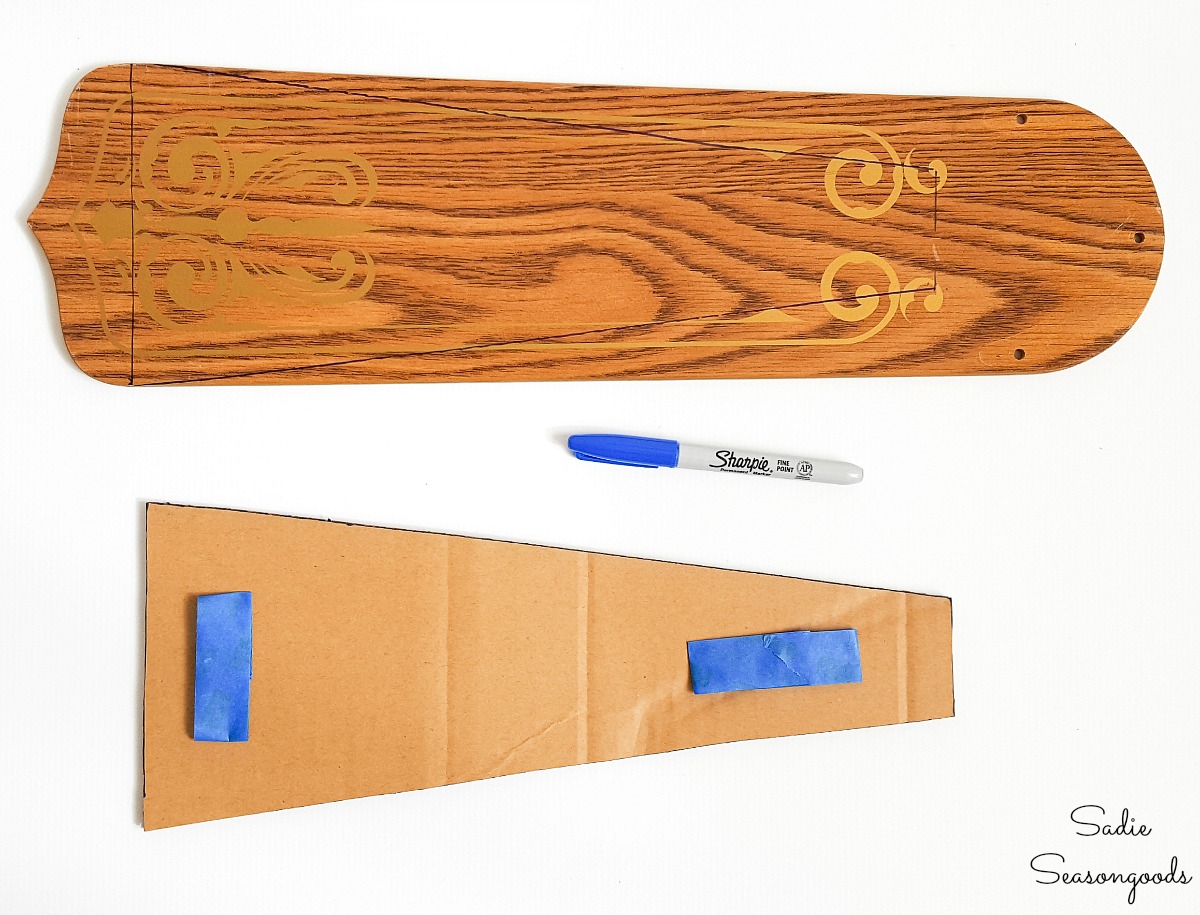
First, I removed the connecting hardware from my blades and wiped them down. We needed to cut them into a more angular windmill blade shape, but I needed to create a template first.
A template would help me ensure that each piece of my windmill decor would be consistent. So, I grabbed some scrap cardboard and a marker.
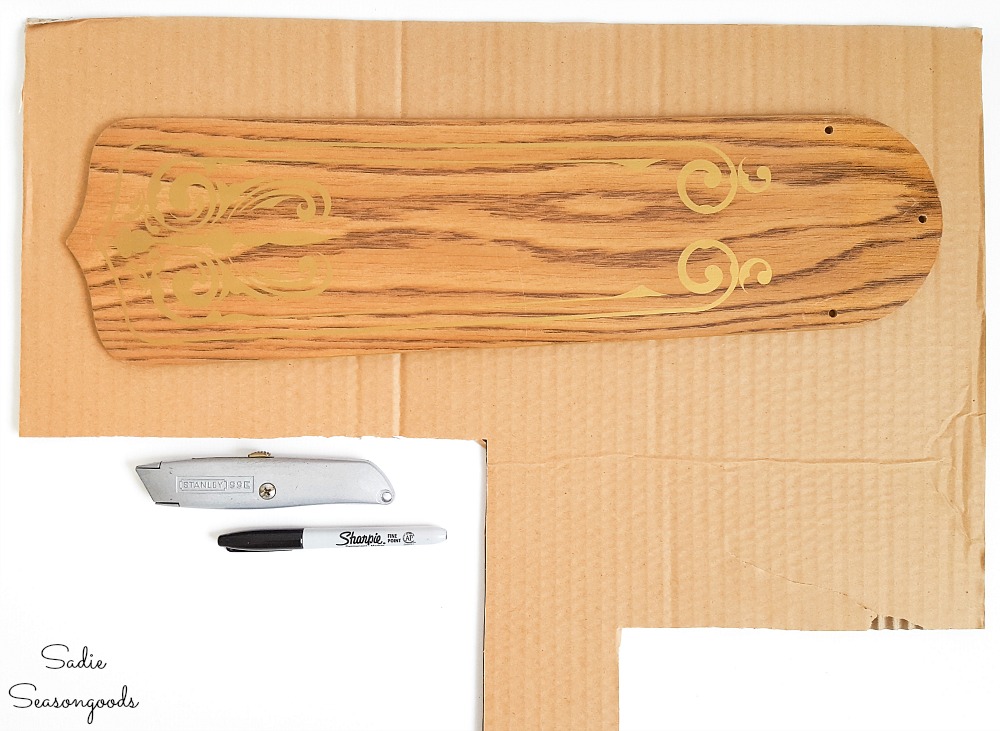
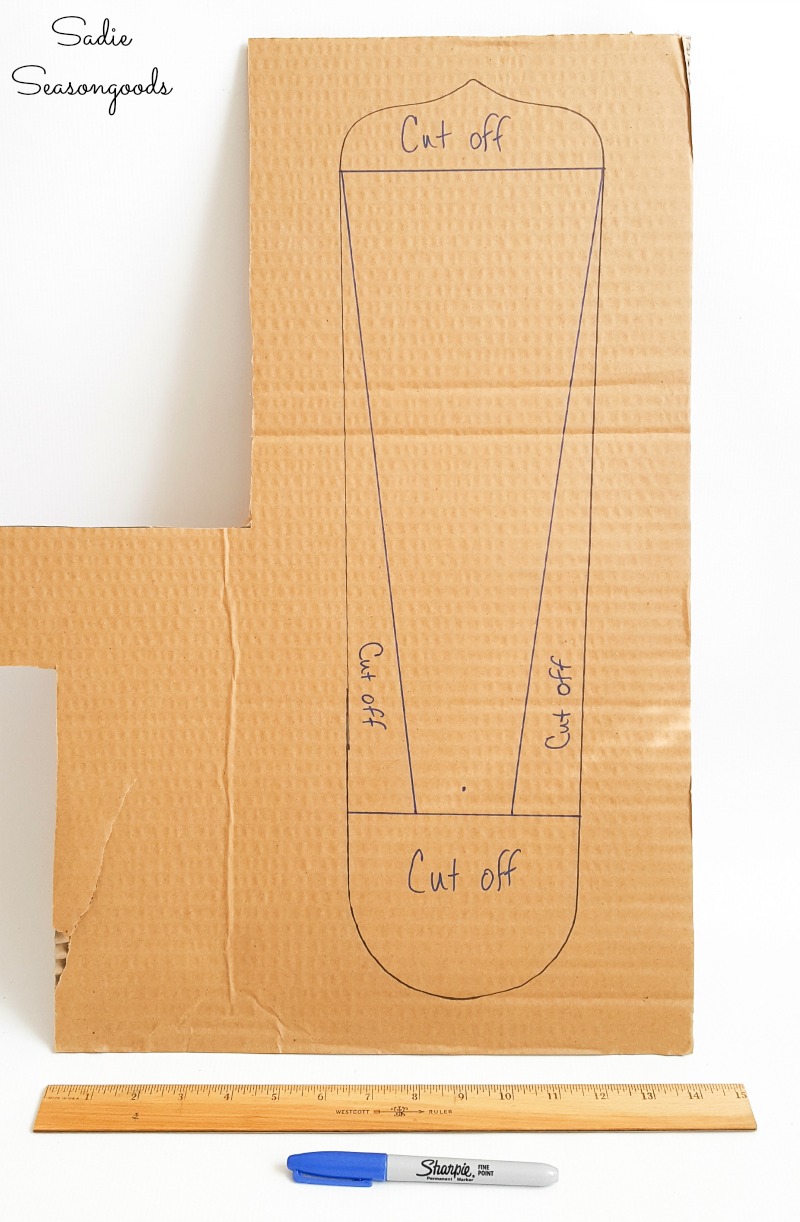
I traced the ceiling fan blade on the cardboard, and then sketched out the windmill blade shape inside my tracing.
See the inner portion of my drawing without any writing? That’s going to be my template.
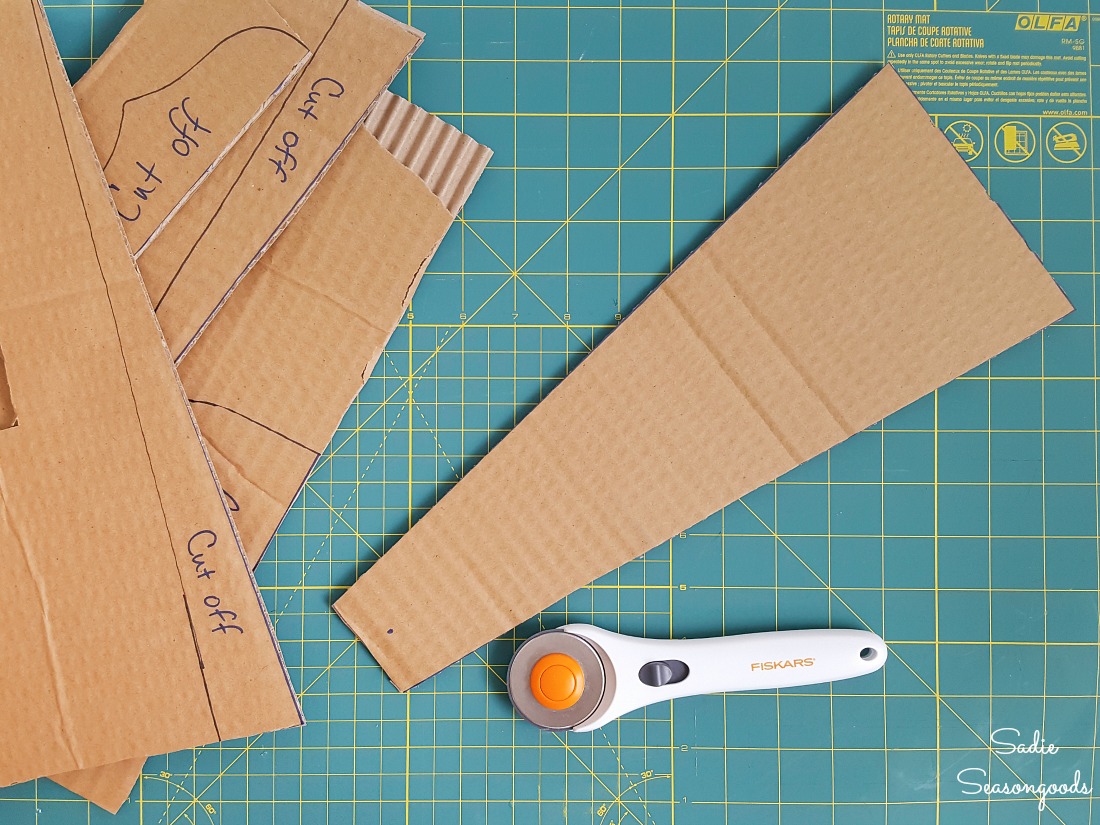
With rotary cutter in hand, I cut out my template on my largest craft mat. Just like that, I had a blade template for windmill wall decor.
Next, I taped the template to each ceiling fan blade and traced it out.
Galvanized Spray Paint and the Rust Effect for Windmill Wall Decor
While Mr. Seasongoods cut out and sanded down each windmill blade, I nabbed a medium-sized floral craft ring.
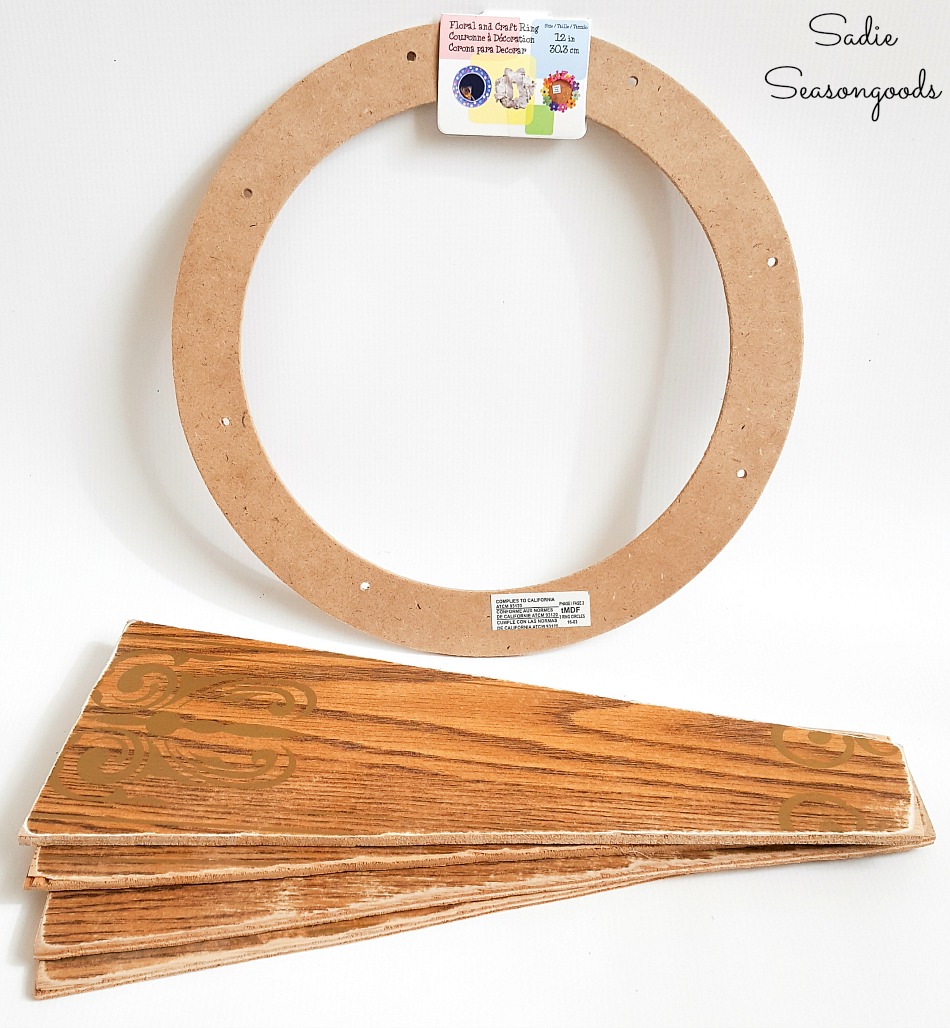
Still with me? Good- things are about to really take shape now!
After purchasing some large, industrial-looking nuts and bolts, we drilled corresponding holes through each blade and a portion (one quarter) of the floral craft ring.
Now, it was time to transform them all into metal with some amazing spray paint…
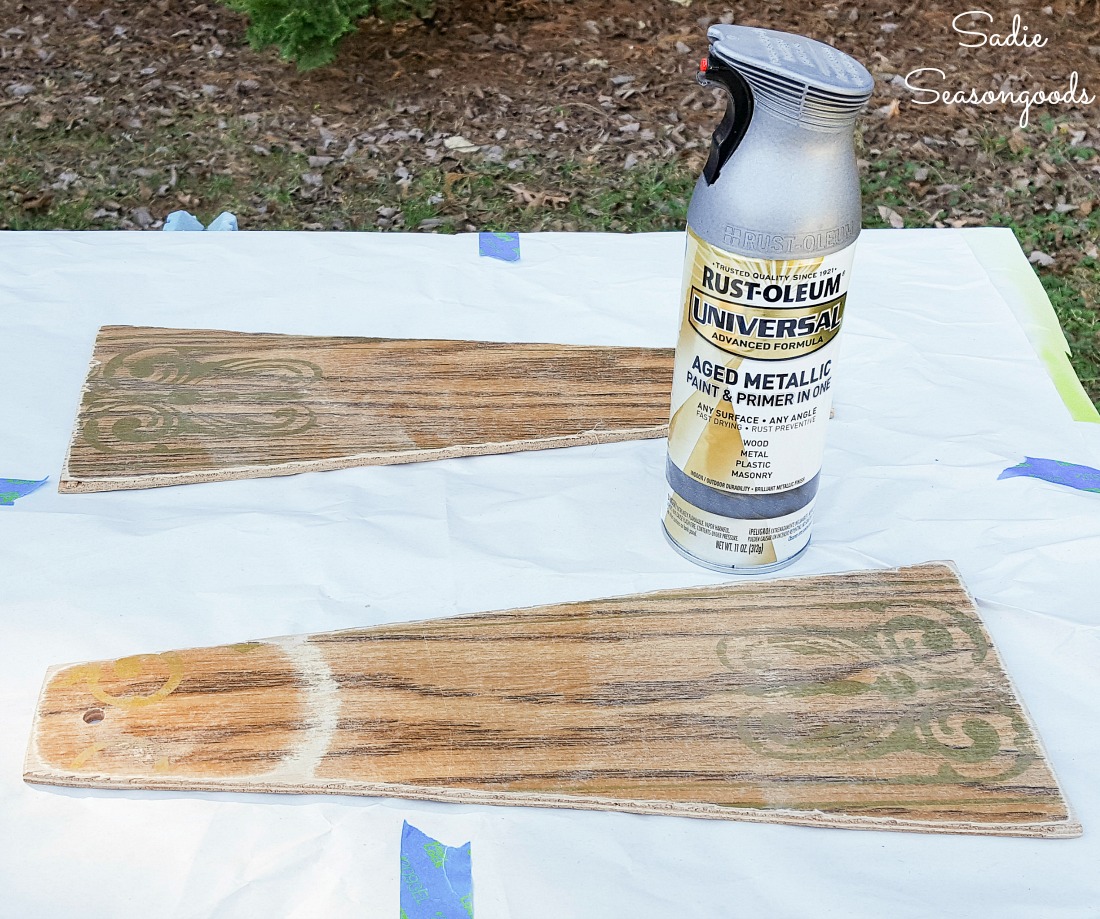
Are you ready for this?
Right before my eyes, I had the perfect blades for my windmill decor. They looked JUST like weathered metal or galvanized steel.
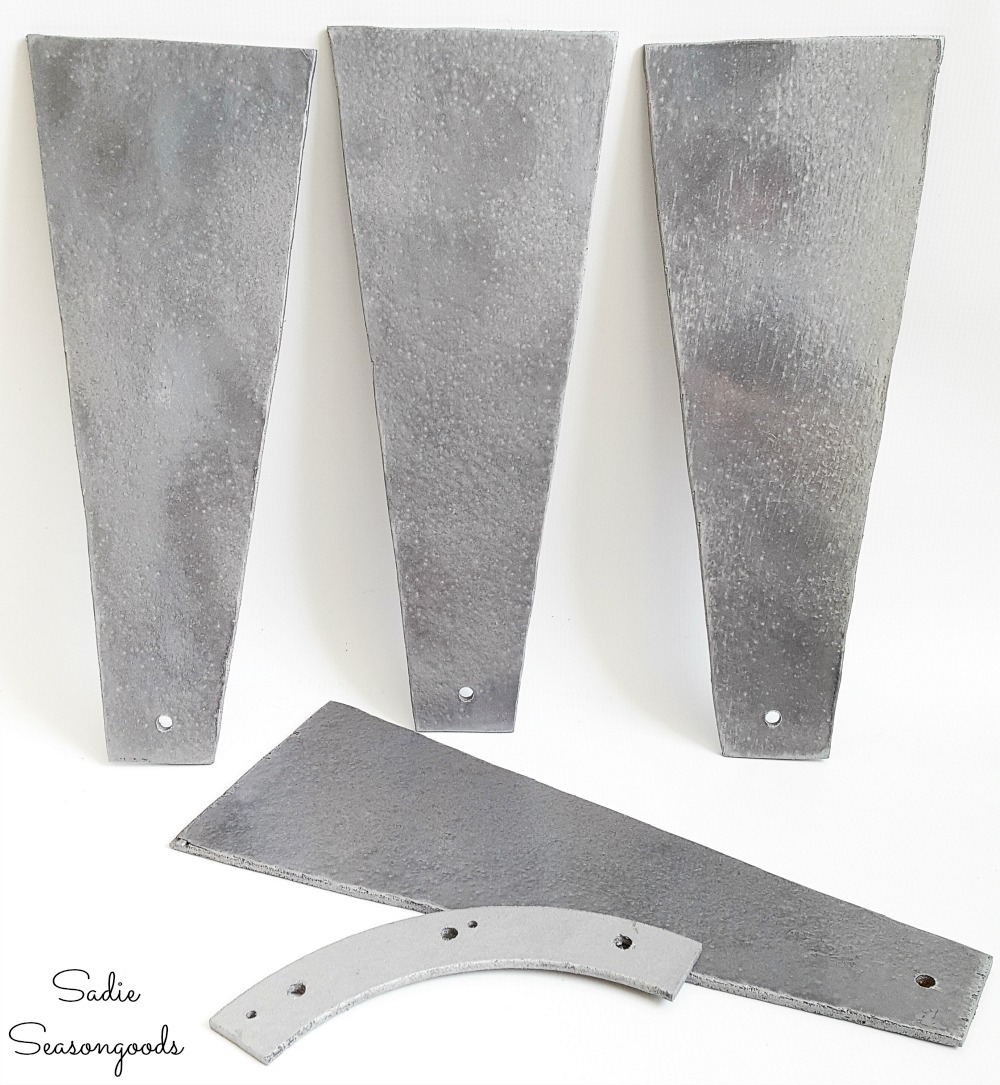
I wanted to add just a touch of rust effect to the windmill decor, but I wasn’t quite sure how to do it.
First, I used one of the windmill blades as a guinea pig. When I was happy with it, I rubbed some rust color paint onto each blade using a cloth rag.
When that dried, I gave the blades a quick coat of matte sealant, to protect the rust effect and to tone down the shine from the galvanized spray paint.
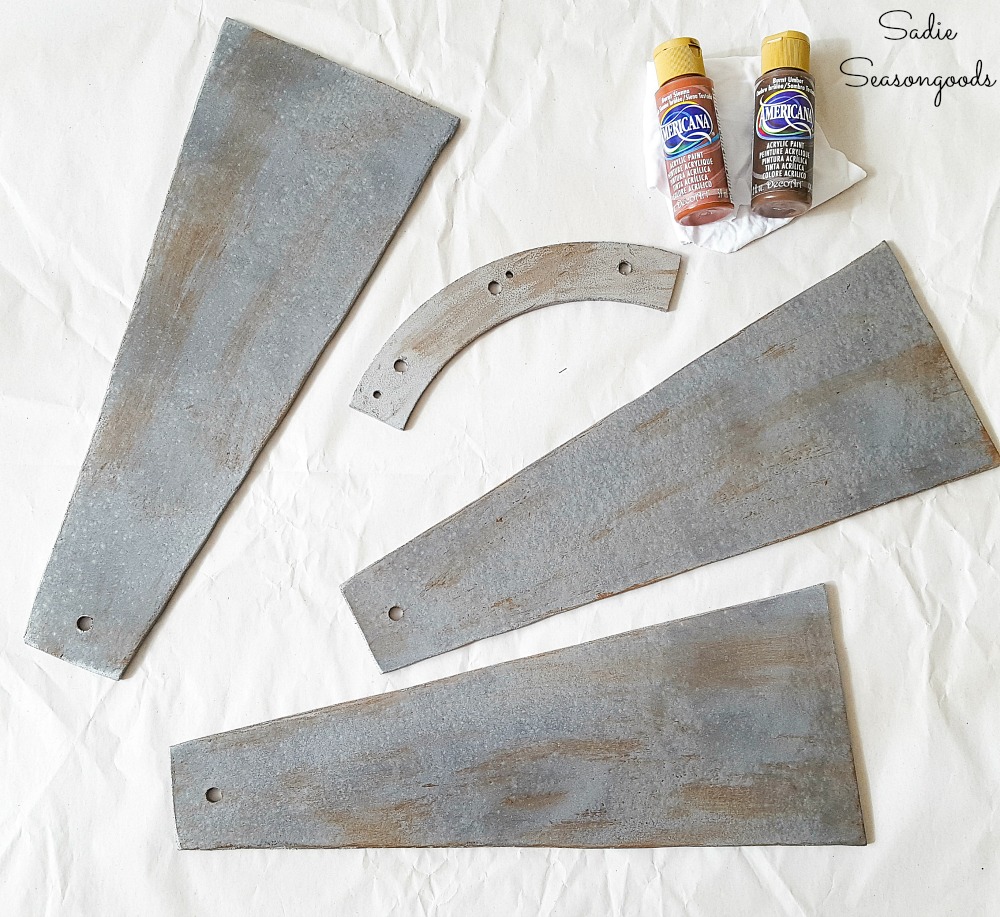
Now that I had painted all the components of the windmill wall decor, it was finally assembly time!
Windmill Decor from Ceiling Fan Blades
First, I bolted the blades to the quarter round of craft ring. Starting to look like a DIY windmill, isn’t it?
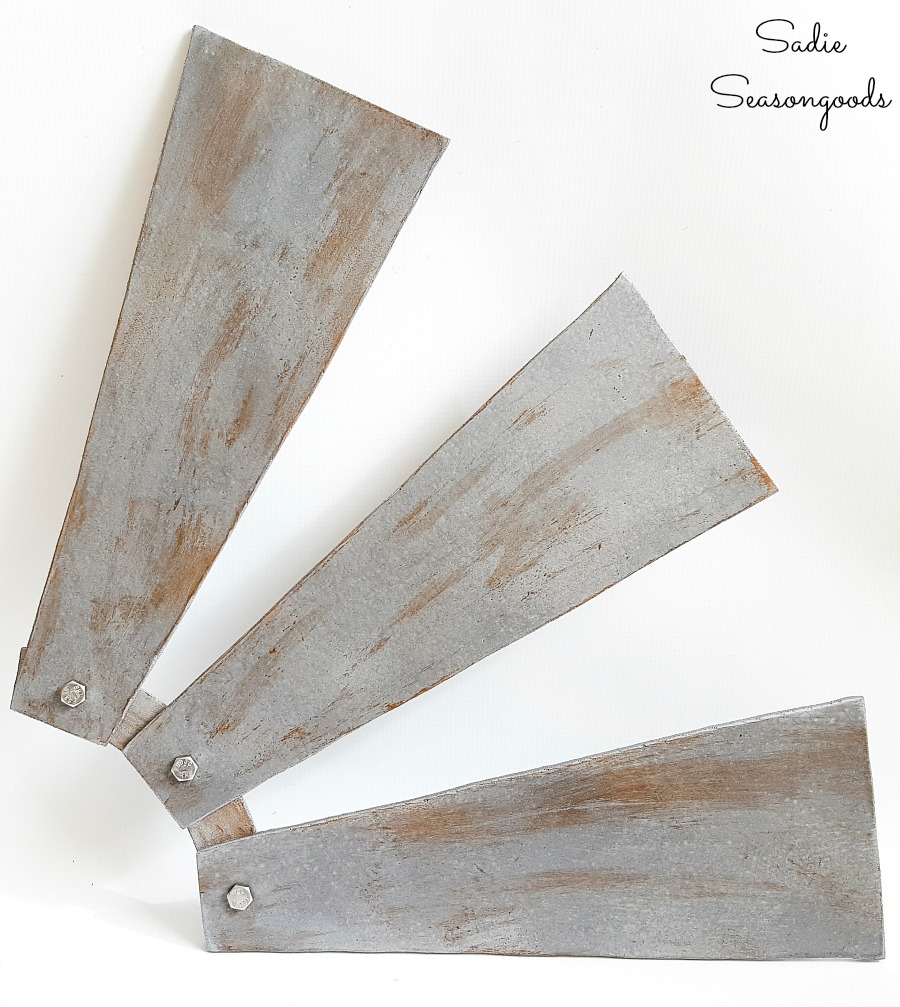
Next, I hot-glued a piece of wire behind the three blades I used. It’s a minor detail, but all the real windmills have that stabilizing wire.
And I wanted mine to look as authentic as possible.
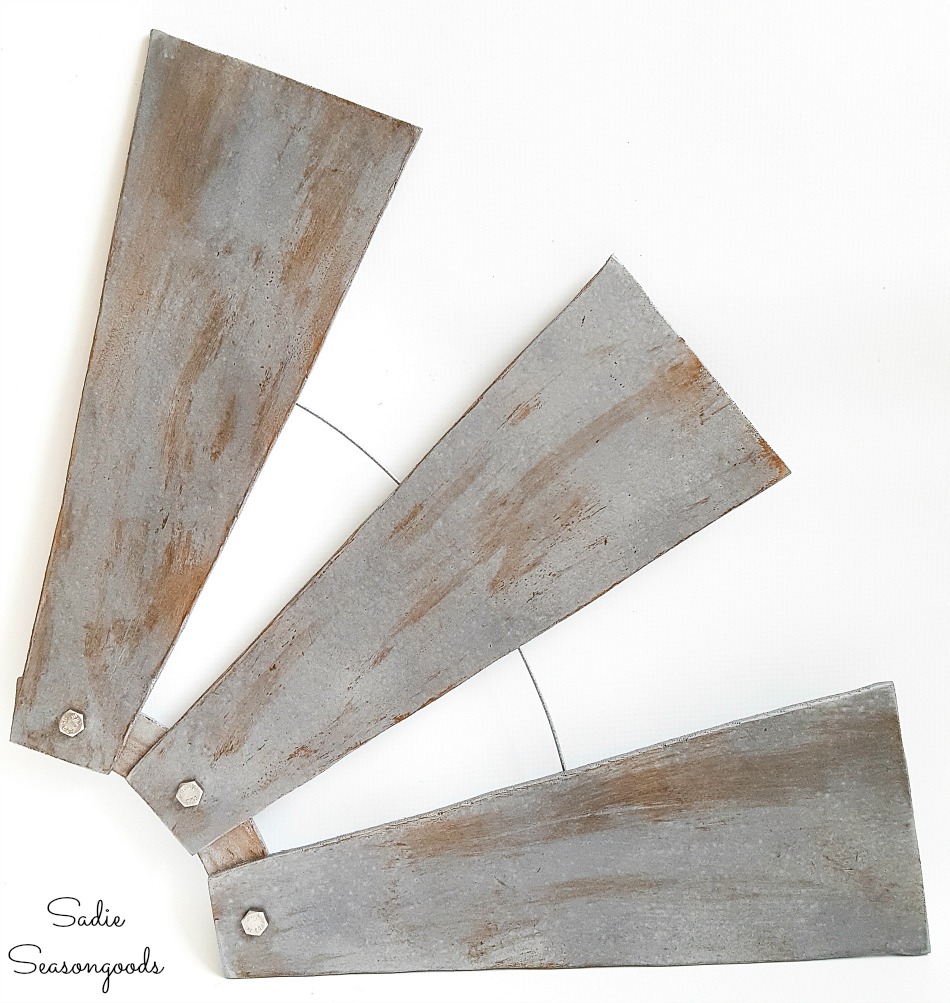
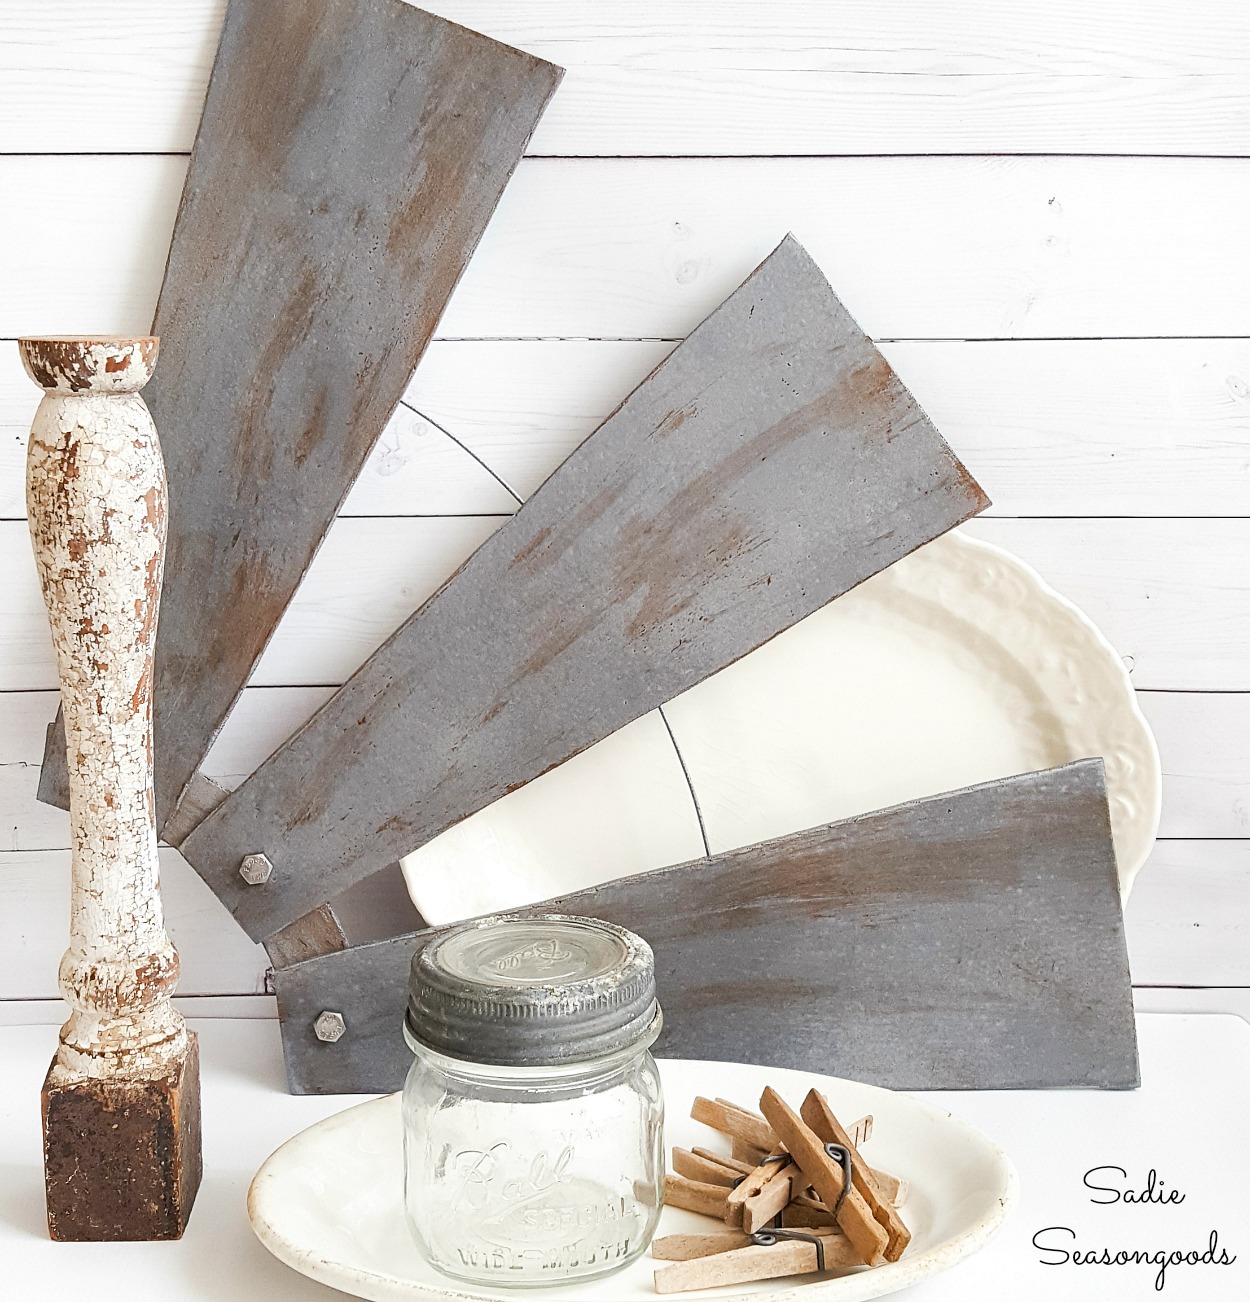
And that, my friends, was it! The windmill decor was done and ready to be used to decorate my home!
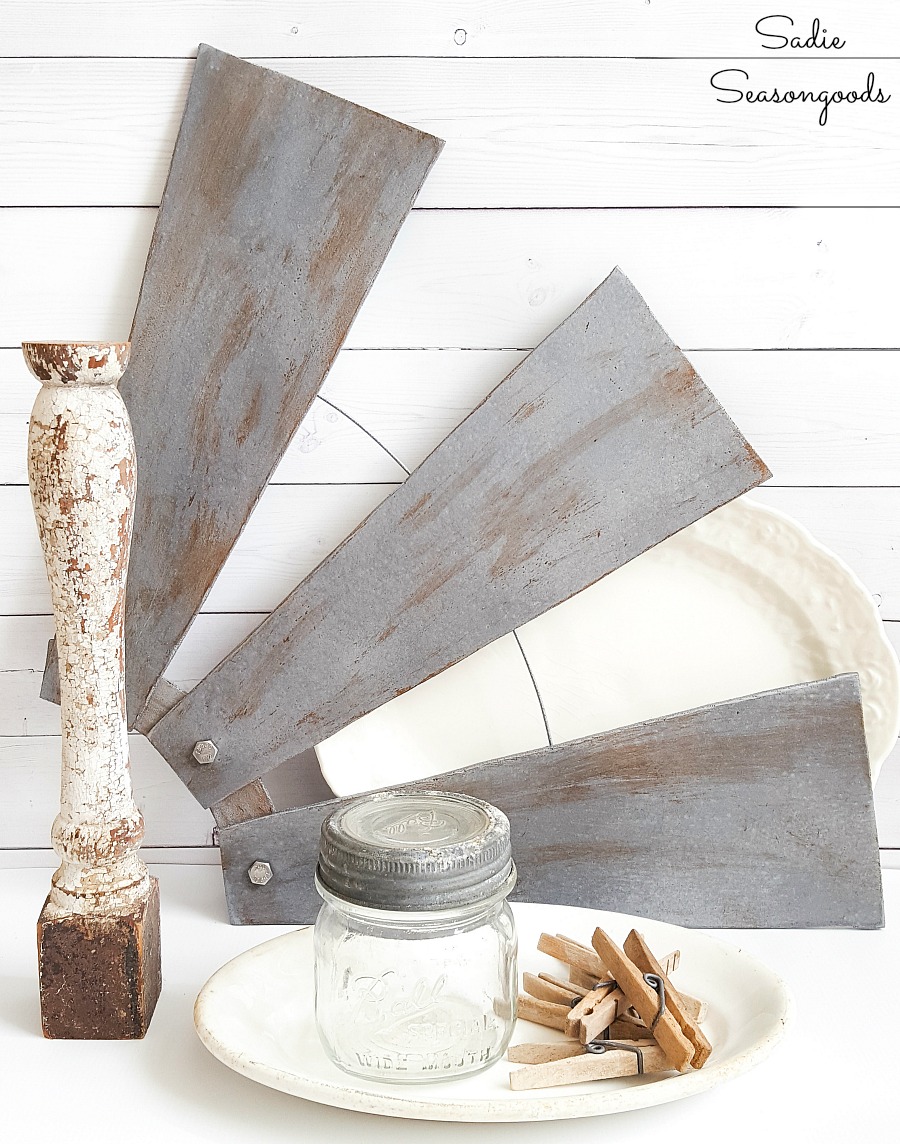
If Joanna Gaines sees this, I hope she doesn’t get mad that I made this windmill wall decor for just a few dollars! Talk about cheap farmhouse decor!
I’m also excited to announce that my first book is now available! If you enjoy upcycling clothing and simple sewing projects, then you will love my book on flannel crafts!
And if you enjoyed this upcycling idea for vintage farmhouse decor, then you’ll love this idea for displaying doilies in a vintage window frame!
Craft on!
S
Want to be notified when I publish my next upcycling project tutorial?
Join me on Social Media:
PIN ME!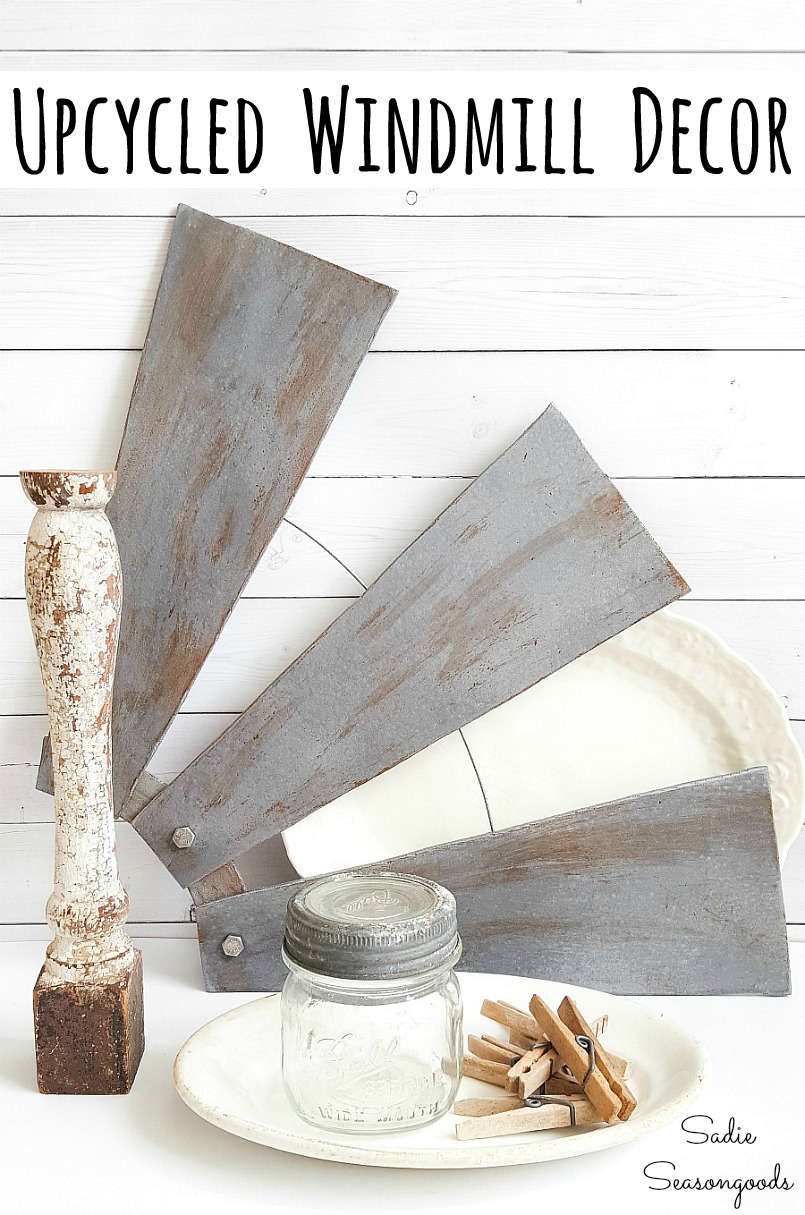
This project is for decor purposes only. Please do not alter any active/in-use/working ceiling fans per this tutorial. The owner of this blog is not responsible or liable for size, shape, angles, or functionality of existing ceiling fans. This tutorial is solely limited to non-use ceiling fan blades that are not electrically connected.
Sarah Ramberg is the owner of Sadie Seasongoods, a website that celebrates all things secondhand. From upcycling ideas and thrifted decor to vintage-centric travel itineraries, Sadie Seasongoods is a one-stop shop for anyone who loves thrifting and approachable repurposing ideas. Sarah is also the author of “Crafting with Flannel” and has been featured in numerous media outlets and magazines.






Wow, this is a fabulous idea! Your faux windmill looks so cool!
Thank you so very much, Vanessa!
Do u put the rust color on when silver is wet or dry?
After the silver has dried!
Would this work the same using a white ceiling fan??
Do you mean white ceiling fan blades repurposed into windmill decor? Absolutely! (I only ask because some people have asked if they could cut/paint their existing blades like this and put them back on their fan- which is a no-no!) 🙂
Sarah, Vanessa is so right! Very cool and I see old ceiling fans in the garbage all the time! Sweet! Thank you for all the great details also. I think Joanna Gaines would be super proud of your creativity. 🙂
Thank you, Christina!!!
Sarah, you never cease to amaze me. You are SO talented. It’s an excellent look.
Thank you, thank you, Rita!!
I have several sets of these blades, and was going to just chunk them because I couldn’t thing of anything to use them for. You have saved them from the dump! Thanks so much, and can’t wait to get started on my ‘windmill!’
Thank you so much, Tracy!
I have some blades too-and can’t wait to play with them!! Thanks for the great idea!!
Thank you so much, Lois!
Get out of town! That’s just plain genius! I bet lots of us are going to copy this idea! Pinning!
Crazy, right?? I have to admit, I impressed myself…I wasn’t sure it would work! 😀
Wow you are so creative!!!
Thank you so much, Barbara!
It looks beautiful. Great idea! 😀
Thanks, Lina!
What a super great idea. I have wanted something like this for awhile and just couldn’t afford the high price. I am so going to try this. You are awesome.
Exactly!! They are SO expensive…thank you so much, Pamela!
Why didn’t you Just paint it like that. And hang beck up on your ceiling? I think that would of been awesome. But it looks cute as an accent. But then it would of been functioning and farmish. I like to take you idea and do that. Maybe cut into a flower shape. Would be cute
If you read through the end of my post, underneath the Pinterest graphic, you’ll see that I do address this and strongly advise that no one do this to a still in-use fan. Painting would be fine, but cutting the blades and re-attaching them to a functioning fan is NOT recommended.
Brilliant! The surfaces look great. I admire your painting skills!
I could also see making a half-circle in yellow and white tones for a morning greeting in my laundry room…but that might be a bit much.
Thanks, Meg!
No, not too much! Great idea! A happy, sunny greeting!!! Go for it! 🙂
Oh, and for a sunburst, you wouldn’t even have to cut off the curvy ends! 🙂
This is one of my all time favorite projects!!! I’m going to make myself one this weekend! Nice job 🙂
Thank you, Susan!!
I think Jo-Jo would give you two thumbs up. Love this idea.
Thank you, Mary!
Brilliant! The rusty galvanized finish is so authentic looking!
Thank you, Vickie!!
Love the farmhouse windmill idea. Very creative I am sure Joanna Gaines would love your approach to crafting! You are a true visionary so craft on! You inspire me!
Thank you so, so very much!
Absolutely great job! Joanna would be proud!
Thank you, Kathy!
Very inventive idea. I don’t have a rustic style house to do that but I have wanted some fan blades to make some big outdoor dragonflies and butterflies. Have you seen them? I can’t remember the name of the lady that started making them. I have collected some fancy curvy chair legs for the body part and i’m looking for odd metal pieces to make the eyes and antenna..
I have- they’re very, very cool!
This is SO awesome, Sarah! Pinned and FB shared 😉
Thank you so very much!
I LOVE Joanna and Chip Gaines. What a cute idea. You did it well.
Thank you, Rose!
How clever and they really do look like timeworn vintage blades! Pinning and sharing.
Thanks, Marie!
So ah-mazing! You are so creative. I might just try this idea myself.
Thank you, Debra!
Success and awesomeness.
Thank you so very much!
good gosh oh mighty sarah this turn out fabulous now to hunt down some fan blades pinned xx
Thank you so, so much! 🙂
Well done! One of the coolest looking repurpose projects Ive seen in awhile! Good for you and Mr.!
Thanks, Michelle!
I just changed out an old fan so I have the blades to replicate your idea but I don’t think it’s quite the right look for French Country. I’m keeping the blag just in case I change my mind!
OMG, I am totally buying some ceiling fan blades next time I see some at the thrift store, this is amazing! Pinned!
Thanks, Tania! I almost always see them there- or at a Habitat ReStore! So glad you like it. 🙂
Great job! Very creative!
Thanks, Cindy!
Beautiful! You did a fantastic job on that faux finish. They always scare me. Adding to my Pinterest queue.
Thanks, Stephanie!
Dang, girl! Could I please somehow acquire a teeny, tiny part of your creative brain? 😉
Hahaha, thank you so very much, Angie! I’m always worried the creativity will run out. 😉
Fun idea! We have a ceiling fan company, so I have my pick of lots of discarded blades and have brought many home. My plans have been for making dragonfly type things, but I love this idea too! Thanks.
Motherload of blades!!! Thank you so very much. 🙂
Whoa! That is so pretty, I love it! I don’t have anot old ceiling fan, but accidents happen…lol.
HAHAHA! Well, if you can’t bear to have an “accident”, check your local Habitat ReStore…they usually have old fans or sets of blades hanging around. 🙂
You are brilliant! This is fantastic.
Thank you so, so much, Karmen!
Girl, you continue to amaze me. I’ll never think of ceiling fan blades the same way.
Haha, that’s a good thing! 😉 Thank you so much, Sharon!
Thank you for sharing at the Snickerdoodle Create~Bake~Make link party! I am featuring you windmill at Snickerdoodle tomorrow.
Awesome, Sharon- I’ll be there!
I came over from 36th Avenue and this is brilliant!
Thank you, Nydia!!
You are most clever!!! That is a wonderful idea. I have really liked the windmills – but they are HUGE. You have come up with a great solution! Kudos!!!
Thanks, Frani- and EXACTLY! My little house isn’t equipped to handle the real thing. 🙂
fabulous project!
Thank you!!
I’m thinking I’d like to change my actual ceiling fan blades to these!! Thanks for sharing on the Pleasures of the NW’s DIY party!
I think a few people will be doing that, based on the comments on my FB post! 😉 Thanks so much.
Crikey, you have impressed me with your creativity and energy. This faux windmill project blew me away and is easily one of most clever recycled decor projects I’ve seen online in quite a while. This is me, applauding you. Two thumbs up!
Thank you so, so much, Ann- I sincerely appreciate hearing that!
Amazing! Such a cool idea Sarah! L.O.V.E. It! Pinning to share. Thanks for linking up with us this week at #Snickerdoodle!
Thanks, Laurie!
Wow!!! I never would have thought to do this! It came out gorgeous!
Thank you so much, Tracy!
Love this! Windmill’s are so popular now, perfect timing!
Thanks, Heather!
Such a great idea. I love how you re-prupose things that I would just toss in the trash. You inspire me. Hope to see you at Family Joy Blog Link Up Party this week. Check us out http://ow.ly/EoHY309pwEK
Thanks so much, Charlene!
This is such a wonderful project! We have two fans we are taking down…I can’t wait to make this! Thank you for sharing!
Thanks, Linda!
This is the answer for me! You are brilliant! I have been wanting a fan, however, EXPENSE and size have kept me from it. This is perfect for my situation. Thank you for sharing.
Amen to both- same here! So glad you like it, Kay!!
That is so stinking neat! I LOVE this idea! I have been wanting a windmill clock, but didn’t want to pay over $100 bucks for it (yuk). I believe you might have inspired me! Wood is so much more doable vs. metal. Can’t wait to make one now!
Totally!!! I’m so glad you like it!
Another amazing craft & they look sooo authentic! Joanna Gaines has nothing on you now! Great look with the vignette, and a clever craft!
Haha, well, she’s still the High Priestess of Farmhouse, that’s for sure! But thank you so much- I’m thrilled at how they turned out. 🙂
Very cute! Thanks for sharing your project at Craft Frenzy Friday on Mom Home Guide!
Thanks so much!
Wow! What a neat idea!
I would love for you to share this with my Facebook Group for recipes, crafts, tips, and tricks: https://www.facebook.com/groups/pluckyrecipescraftstips/
Thanks for joining Cooking and Crafting with J & J!
Could you tell me what size (in inches), for the craft ring. Michaels has a 12 inch and an 18 inch. I’m going to try to make these tonight. Thanks!
Jackie, you can actually see the size on the label in my photo! 🙂
Got it. Thanks.
This is one crazy beautiful idea. And I love it!
Thanks, Camille!!
I seen those internet prices, and they are imposible. You did a great job and thrifty too.
Thank you so very much! They ARE insane prices!!
Such an amazing idea Sarah, those prices are completely nuts and yours looks stunning. Great re-purpose
Thank you so, so much, Michelle!!
I have never seen the show Fixer Upper but I do keep hearing about it and the stars of it. You are very creative your own self. I am currently crushing on some Rustoleum paint tricks too! Love how your project came out. They do look metal. #merrymonday
Thank you very much!
Girl, Joanna should be calling you for tips, this is so pretty! I can’t get over how much the fan blades look like metal. Thank you for sharing with us this week at Celebrate Your Story, have a great weekend.
Thank you so much!!
Wow! This is awesome! Who would have thought?
Thanks, Amanda!!
Well I have to agree your ceiling fans never looked better. Joanna would be proud of you Sarah! I must make a mental note to get that spray.
Thanks, Mary!!
Wow! I would have never guessed these are made from fan blades!! Loved this DIY! thanks for joining us at the Family joy blog link up party. Pinned!
Thanks so much!
Curious…why did you not use the fourth blade?
For a couple of reasons- one, even though I’m NOT a rule follower, I do like the Rule of Three in decorating. Odd numbers just are more pleasing to my eye. And the second reason is that I was able to test different paint methods for the “rust” on the fourth blade…so that I could pick the best one to share with you!
Really clever! Wish I had a way and place to saw!
Thank you so much!
Such a creative and cute idea! Thanks for sharing with us at Funtasting Friday 🙂
Thanks so much, Debra!
This is amazing! Nice work! I never would have guessed they were old fan blades. I’m impressed. 🙂
Aloha,
Charlee
Thank you, Charlee!
I love it!!! I have seen the windmills on Fixer Upper and had thought I would like one for my home. Now you have made it possible! Thank you so much!
Exactly!! Thank you, Dianne!
I love the windmill, but I love the Pope Gosser, Rose Point platter behind it. Would you consider selling it? My father-in-law, now 96 years old gave my mother-in-law a set of them for her 18th birthday.
Hi, Lisa- Possibly. Please send an email to [email protected] with what you’re thinking. I need to take a close look at it as there may be flaws (I have several white platters and can’t recall which ones have what).
This insanely jaw dropping-ly clever. I’m in the process of swapping my decor taste to farm house style, so I am going to copy this idea!!
What an outstanding idea. To bad I just got rid of three old ceiling fans. I am kicking myself all over the place, because I adore this fanstatic idea of your, and would love make one like this to.
Thank you so much, Ivory!
This is genius and just so cute. Brilliant idea.
These are amazing. I can even see them in different colors and yet remain on the original fan. Another idea may be to do a spray adhesive and put fabric on the blades to coordinate with décor of the room the fan is in. How cute and easy is this project.
Thanks, Katie!
Holy shiplap woman! That turned out A-mazing!!
Thank you so much, Teri!
Everyone is running around looking for old fan blades now after being inspired by this awesome project! Very smart and well done. Thanks for sharing with us at Waste Not Wednesday Link Party!
Haha, I think you might be right! Thank you so very much! 🙂
Really cool idea with very little cost. I love the color of the blades and the shape.
Thanks, Jeff!
This turned out so fabulous!! I have never tried using that Rustoleum aged Metallic’s before!!! This awesome project sure has made me want to plus find some fan blades! So very creative and clever!!
It’s kind of addictive, Sam!! I’m already playing around with a second project using it, LOL. 🙂
Wonderful idea. Farmhouse decor is so trendy, this is an amazing upcycle. I am especially impressed how you finished them to look like aged metal.
Thank you, Leanna!
This looks so Good Sarah and is perfect farmhouse styling – love it
Girl… do you see how many responses you have to this GENIUS idea!!!!
You have made us DIY’ers so very happy!!!!
Thank for the BRILLIANT idea!!! Kudos to you!!!
Haha, yes- I’ve loved the response! 🙂 Thank you so much!
Seriously, looks awesome!
Thank you, Kellie!
Amazing! That is so creative! Great work ?
Thank you so very much, Margaret!
OMG!!!!!!!!! How amazing is this??? You are so very talented dear. I love JoAnna Gaines but for me n my wallet, I love this even more. Thank you for sharing n I plan on making me one… I’m so excited. I will be following you. Lol.
Thank you so very much, Dawn!!! The real ones are cray-cray expensive- I love them, but combine the cost and the SIZE…my little ol’ house couldn’t handle it, even if my wallet could. 😉
Any reason why a full windmill blade wouldn’t work? Amazing! Love it
Hi, Lori! I’m not sure what you’re asking- are you asking why a REAL salvaged windmill wouldn’t work? The answer to that is my house is too small to support that…plus I don’t want to spend $1,000 on it! If you’re asking why I didn’t make a full windmill, the answer is, I only had 4 blades from my fan and used one to test paint techniques on. 🙂
LOL, I was referring to making a complete windmill blade. Do you think that would work? (Instead of just the 3 blade)
Yes- BUT you’ll need a good stablizing piece. Since I just used three blades, thin, inexpensive wire sufficed. But for a larger “windmill”- either a half or whole- would need something much more stable to keep the shape.
I love Fixer Upper and Joanna Gaines is a phenomenal interior decorator!! You did a great job on this project and love the fact that it cost next to nothing! I always feel that these shows spend way more than necessary when they could get the same results for far less as you have just shown!!
Thanks so much, Sharon!
Love it! Definitely making one. My obly question is, how are tou getting a “pitch” on the blades so they move air? This is done with the blade mounting on fans as far as i can see.
I’m just using them as wall decor- not on my fan (which I completely replaced)- so no pitch needed. 🙂
Love the look!! I bought all my supplies and plan to make one today. Could you possible list the measurements of all your cut lines? Thank you!
The blades are 15″ long, 4.5″ at the top, and 2″ at the bottom. Happy crafting!
Thank you! Excited to start! 🙂
Hi, LOVE this. Could you give the measurements that you cut the blades to please?
The blades are 15″ long, 4.5″ at the top, and 2″ at the bottom. Happy crafting!
Loved this! I just made it. I had pretty laminate flooring leftover so I used it instead of the fan blades. Looks amazing. Thanks so much for the idea!
That’s awesome, Suzanne! I’m so glad I could help. 🙂
how can i print out your recycle of ceiling fan blades to make a windmill project?
Hi, Shirley! Each computer/printer is different so I don’t know how to give you specifics. But you should just be able to print the blog post out directly from my page.
Thank you.
Thanks so much for linking this up at The Farmhouse Friday link party! You will be featured at tomorrow’s party! 🙂
Thanks, Michelle- just linked up and tweeted about the party!
Oh my goodness! I sure wish I had seen this prior to hauling a bunch of these to the thrift store! I kept them around forever thinking I’d make something…but I got into a cleaning frenzy and put them in the give away pile. Oh. No. Guess I’ll be buying them back from Big Bros &Sisters. Lol (don’t tell my husband. ?)
Hahaha, isn’t that always the case!!! Thank you so very much!
Darn, Another thing to add to my list of “wants” to be on the lookout for during summer yard saling! The windmill blades are awesome. But, being a troublemaker, I want to know what you did with the 4th blade. The untrimmed top looks like the beginning of a doll chair. Garden marker? Too good to just sit there!
Love it!
Thank you, Nancy!
how did you get the blades to stay attached to the floral round?
I mentioned it right below the picture of the “rust”- bolted them on! 🙂
This looks so awesome! What a great idea!
Thanks, Fiona!
I can’t find a picture of the complete project to see it on the post and where is the 4th blade u did go?
Ahh, sorry I didn’t make it more clear. I ended up only using three (the power of odd numbers in decorating)…and I also had used the 4th blade as the guinea pig for my ‘rust’ paint job. Again, my apologies for not making that distinction.
If my foot could touch my butt, I would kick myself. I just had my hubby to take down two ceiling fans in which I took them out by tge street I could have turned them into thôse fantastic windmills like the one you posted. I love what you did here. I’ve always wanted one of these. Thanks to you,the next time I see a ceiling fan,, I can turn its badges into a windmill
Argh, don’t you hate it when that happens!! But if it comes to it, my local Habitat ReStore sells bundles of blades for about $5…
Love it but have a question you might have already answered please forgive. You stated the Mr. Did the cutting. Since I am a novice at using some of those cutting tools can you share what tools he used to cut that shape.
No problem!! He used our jigsaw for it. A hack saw would also work, as well (I think).
Yippeee… I have the same blades sitting in the back shed. 🙂 Guess I need to get hubby to haul them out, as this would make for a lovely project to do with them . Thanks for sharing.. ♥
Woohoooooo!
Love love love this. Those of us on a tight budget have to be creative!
SO true, Tina!
So cool! I love this! I’m planning on making one for myself. Can you tell me what gauge wire you used? I’m thinking about going a bit thicker…. Also, what length did your blades end up being?
Hi, Joanna- I don’t recall the gauge of the wire, but the blades are about 15″ long. If you read through the comments, the exact blade measurements are in there somewhere. 🙂
Thanks… I found the measurements for the blades. I think I will use a 16 Gauge half hard wire. Seems about right. Very cute idea!
Will you please share the names of the 2 rust colored craft paint you used on the blades?
Burnt Sienna and Burnt Umber, I believe! 🙂
I love what you did with those tacky fan blades. I would like to know how you got the “galvanized” appearance on the blades. Did you use different shades of gray spray paint? I want mine to look as good as yours. Thanks for a wonderful idea for those of us who are not creative but want to be.
Thanks, Karen! It’s the special spray paint I used, which I link to in my tutorial! (Look for the bold, blue text when I talk about paint)
Why is it a no no converting fan blades to windmill
Wow, what an original makeover, I really love it. I will definitely be trying this.
Thank you so much, Anita!
A friend of mine made one of these a couple of years ago and she did it almost exactly like you did. She made hers with 5 blades and it looks great. Yours looks fantastic! So simple and fun!
This project was actually published back in 2017 and has been one of my most popular and replicated (LOL) project to date!