Vintage buttons are such a fun and easy thing to collect, aren’t they? Perhaps especially the rhinestone buttons. And after collecting a handful of them, I decided to show a few of them off in the form of a DIY charm bracelet. Admittedly, I actually prefer vintage rhinestone ANYTHING over real diamonds, so this was right up my alley.
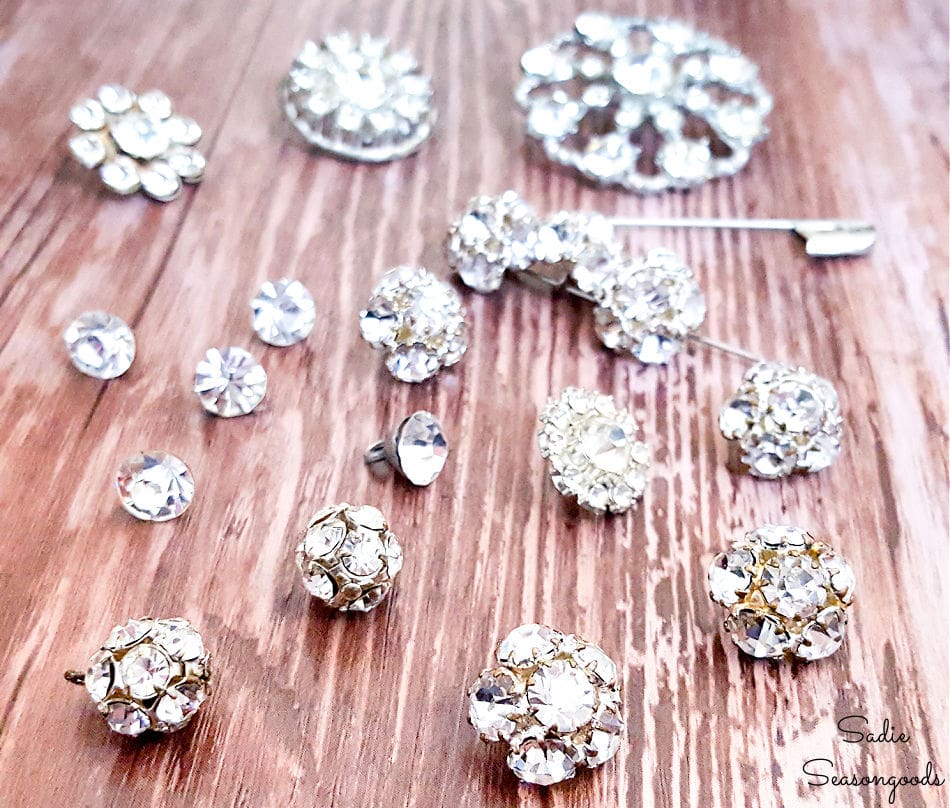
The common denominator (other than rhinestones, of course) is that they were all shank buttons. And that’s important for this form of button jewelry!
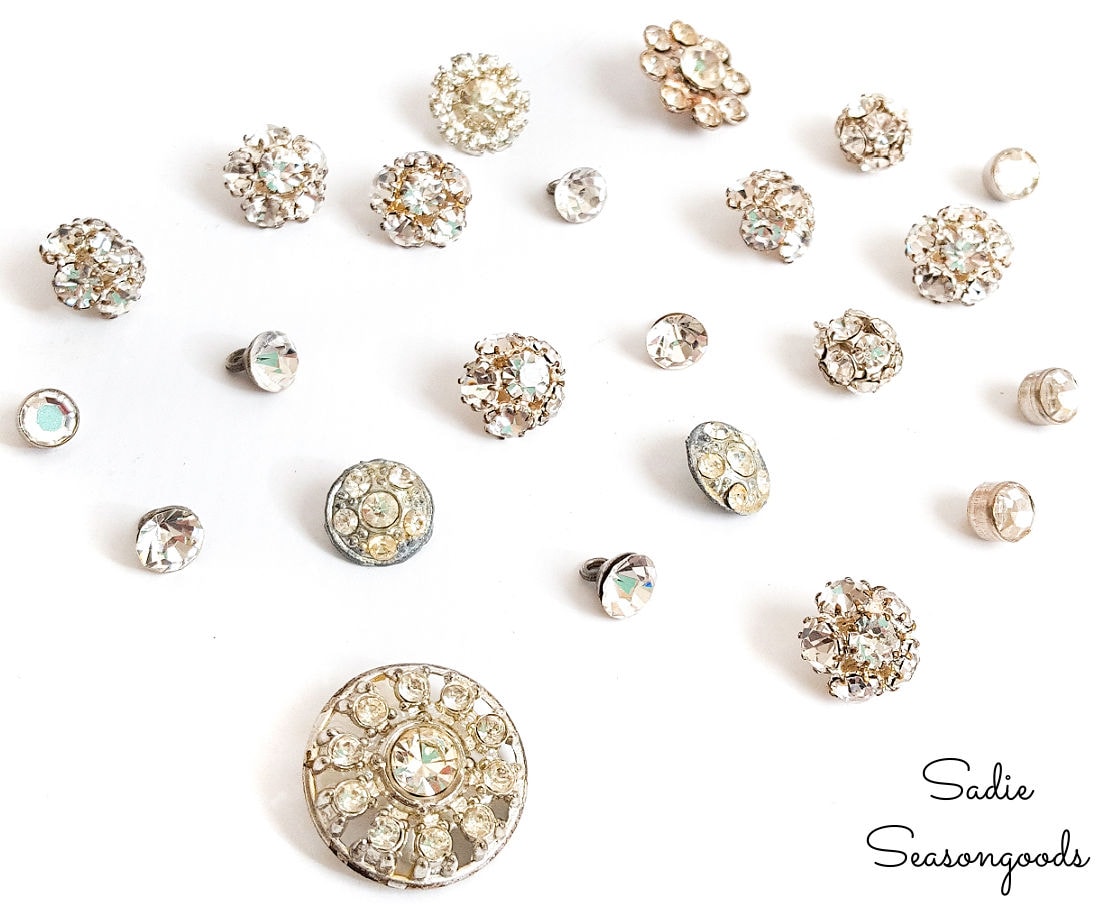
To create my own DIY charm bracelet, I just needed a few other jewelry making supplies from the craft store. Once I had everything in hand, I was ready to work on my jewelry making project!
This post contains affiliate links for your crafting convenience. As an Amazon Affiliate, I earn from qualifying purchases. All blue, bold, and underlined text is a clickable link, either to a product or to a related post.
Crafting with Vintage Buttons
A quick note before we get started. I found many of my vintage rhinestone buttons on Etsy. Just in case you have trouble finding them at your local antiques mall!
First, I needed to re-size the linked chain I planned on using for my DIY charm bracelet. My wrist is seriously the only dainty body part I have, so I relished in this rare moment of needing a smaller size!
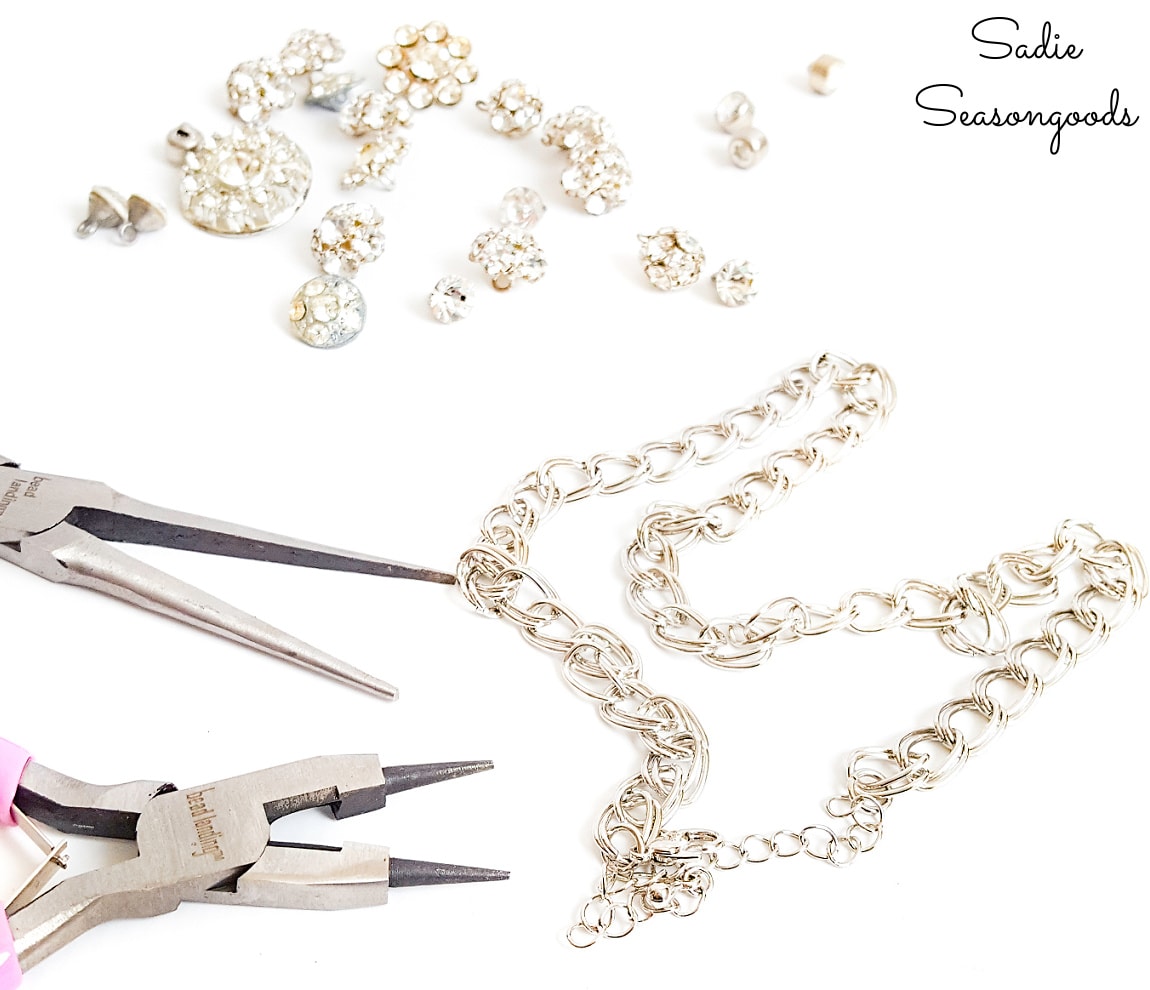
To do so, I grabbed my jewelry pliers to remove a few links. Once I figured out a good size, I added a clasp.
The chain came with a lobster claw clasp, but I am just not that coordinated. So, I swapped it out with a strong magnetic clasp, but any clasp would do.
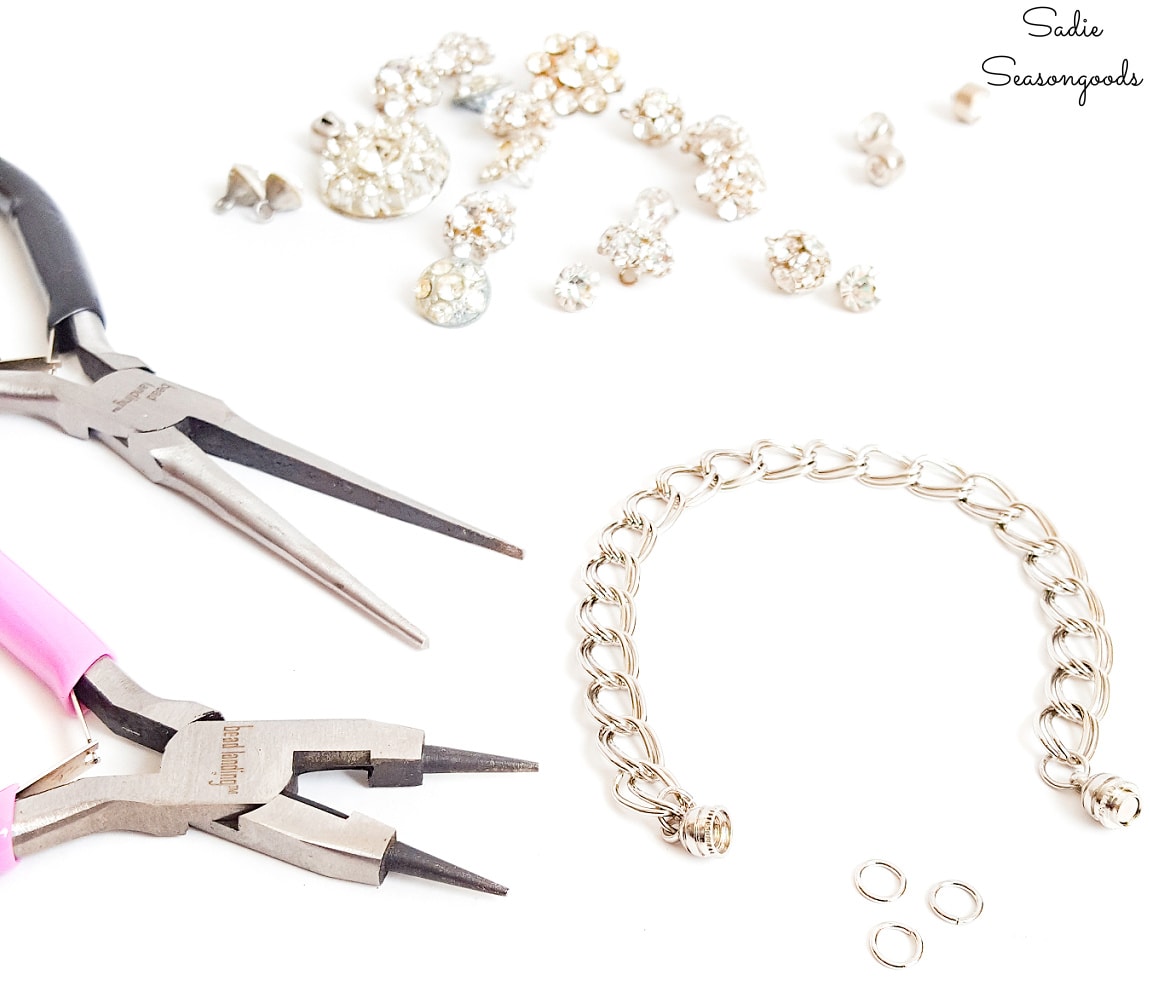
Next, I needed to attach the rhinestone buttons to the bracelet chain! First, I stretched out my chain and started lining up the vintage buttons. I arranged and re-arranged them until I was pleased with their order/spacing.
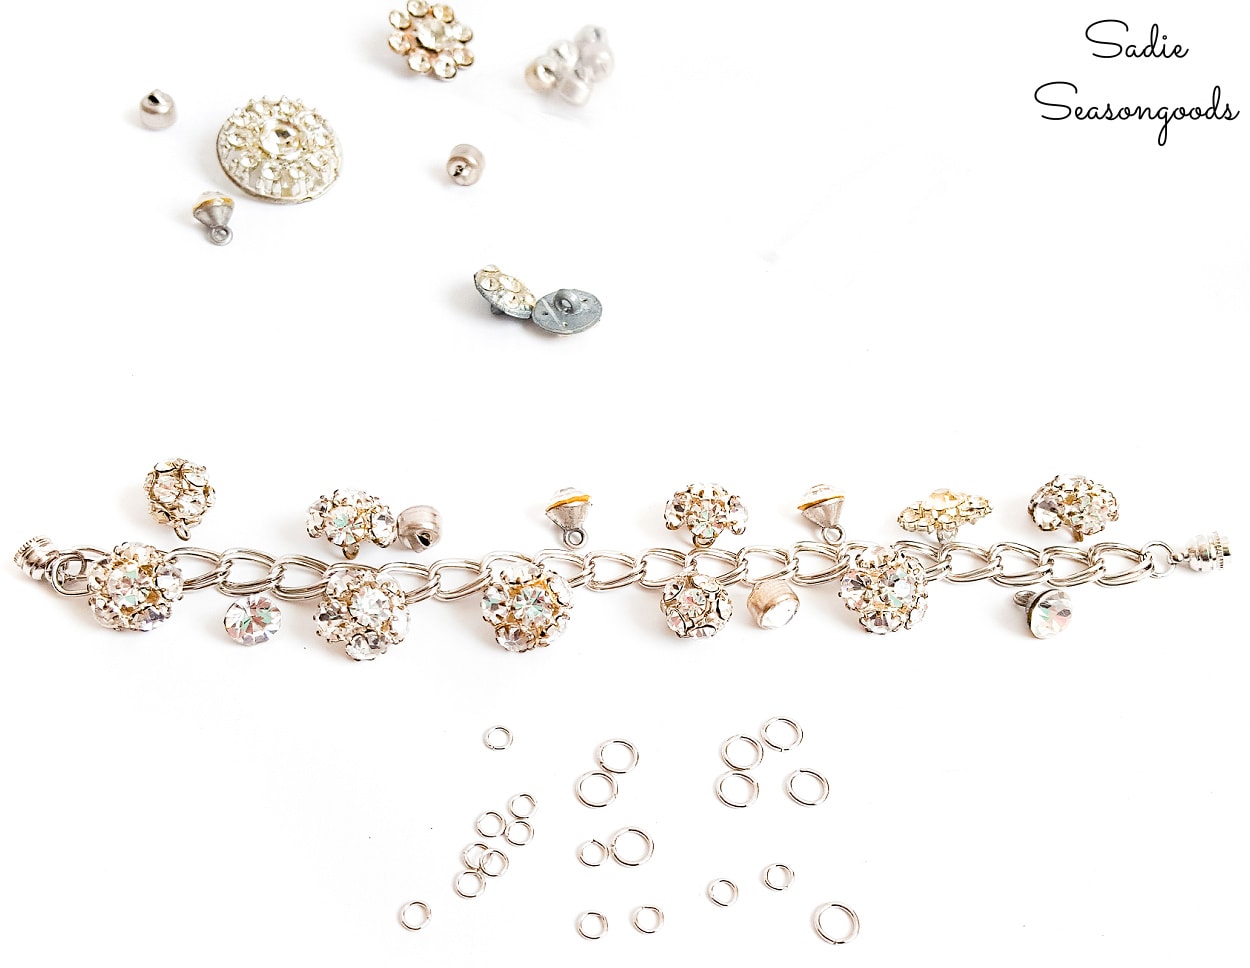
Attaching the Vintage Buttons to a DIY Charm Bracelet
I used a variety of sizes of jump rings for this step. For instance, I paired up smaller jump rings with the smaller buttons, and so forth. T
hen, I simply opened up jump rings, slipped on a vintage button, and closed the ring around a loop on my chain.
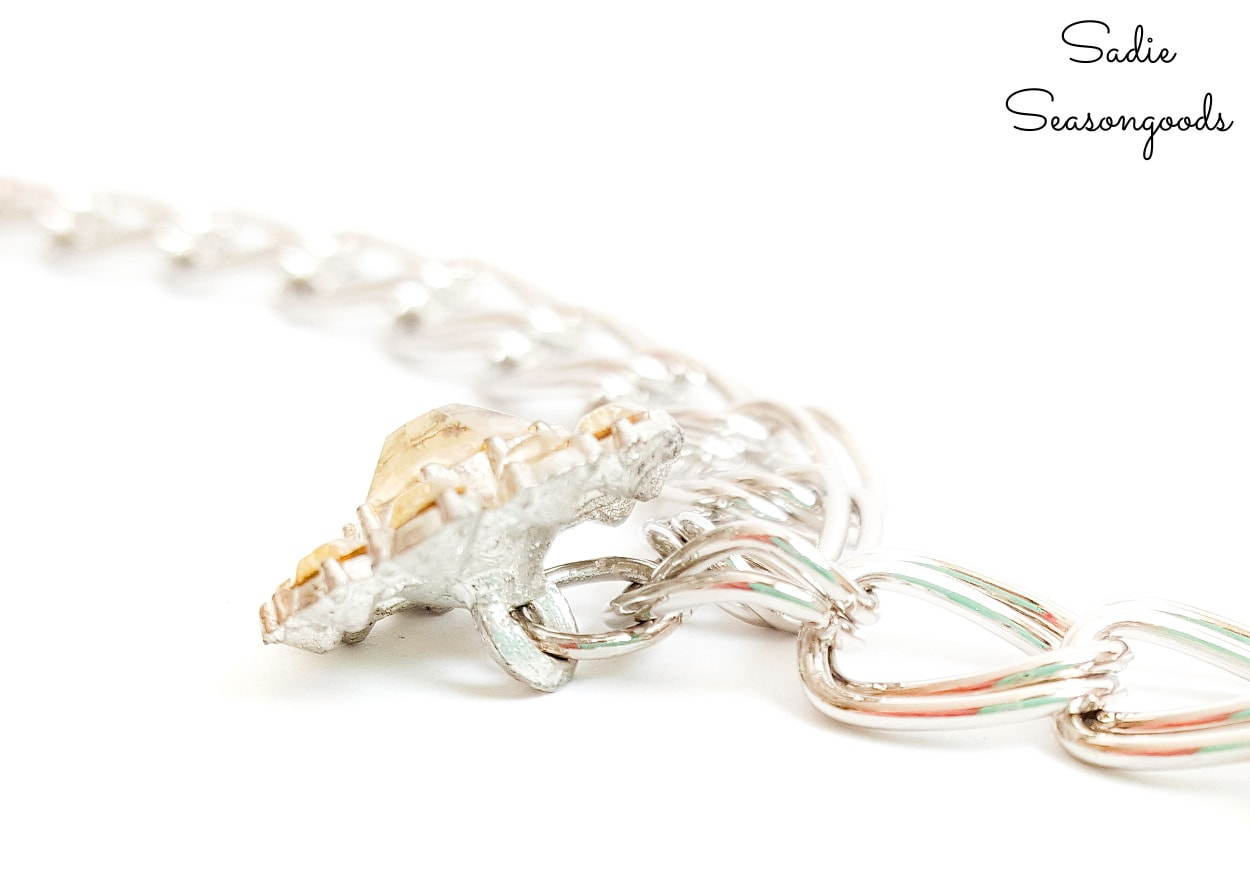
I mean seriously- making a DIY charm bracelet with rhinestone buttons is just that simple! I’m kind of embarrassed at how simple this is…it probably didn’t warrant a blog post!
Finally, after attaching many of the rhinestone buttons to my DIY charm bracelet, I stretched it out for a final look.
I tried to space them out fairly evenly, and closed the jump rings around either side of the bracelet chain.

And that was it, my DIY charm bracelet was all done! And seriously, pretty darn gorgeous, if I do say so myself.
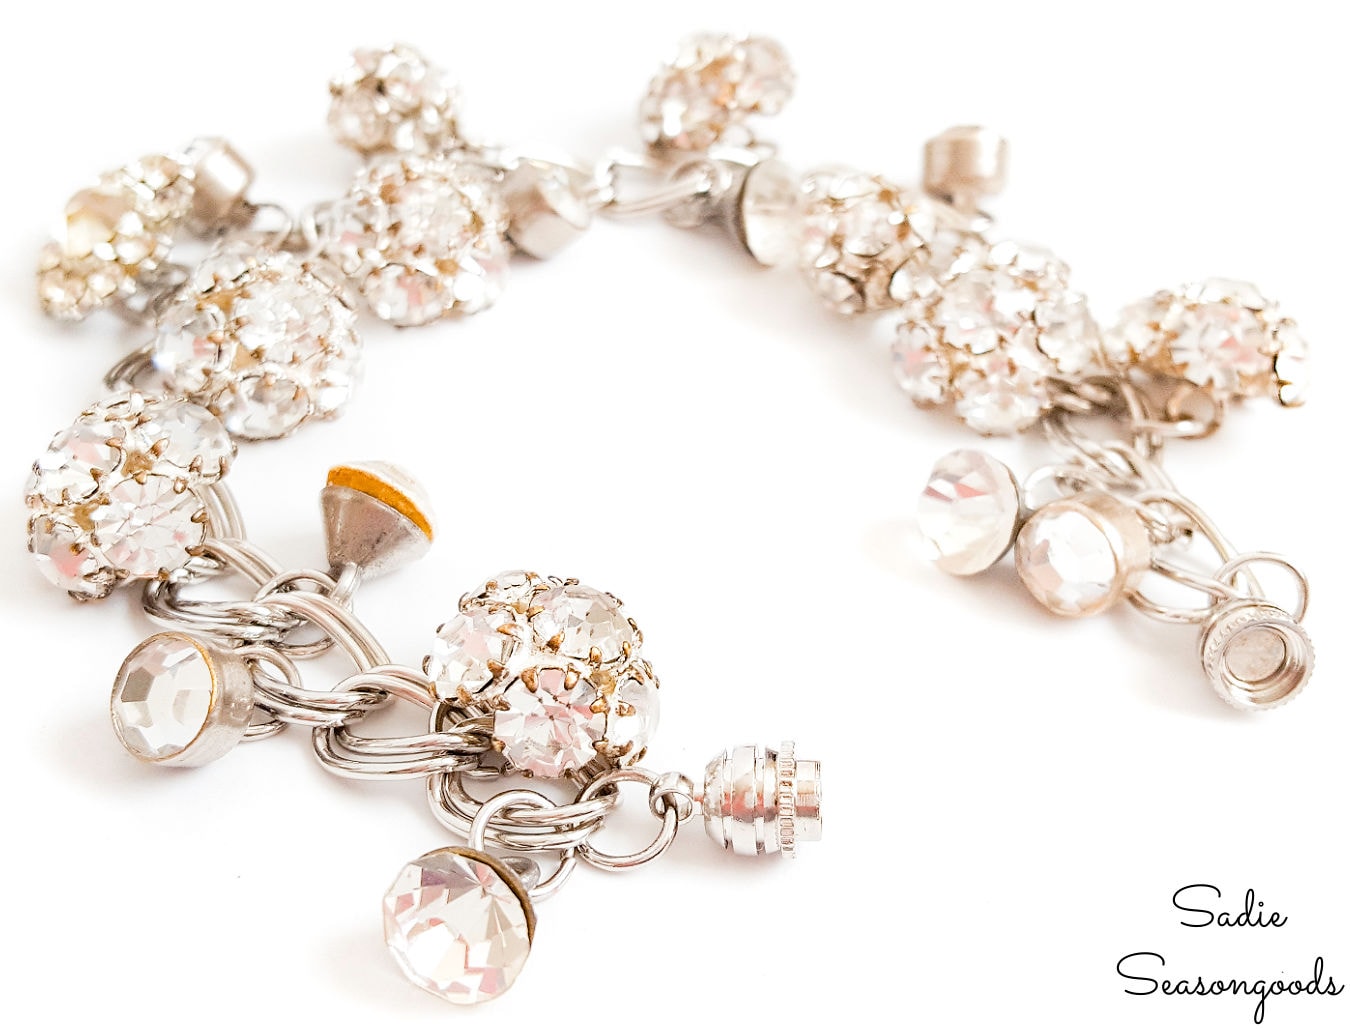
DIY Charm Bracelet with Rhinestone Buttons
I love the flash that vintage buttons have. Honestly, this DIY charm bracelet is better than ANYTHING in a mall jewelry store, as far as I’m concerned.
And it literally took no time at all to make. Maybe 30 minutes from start to finish?
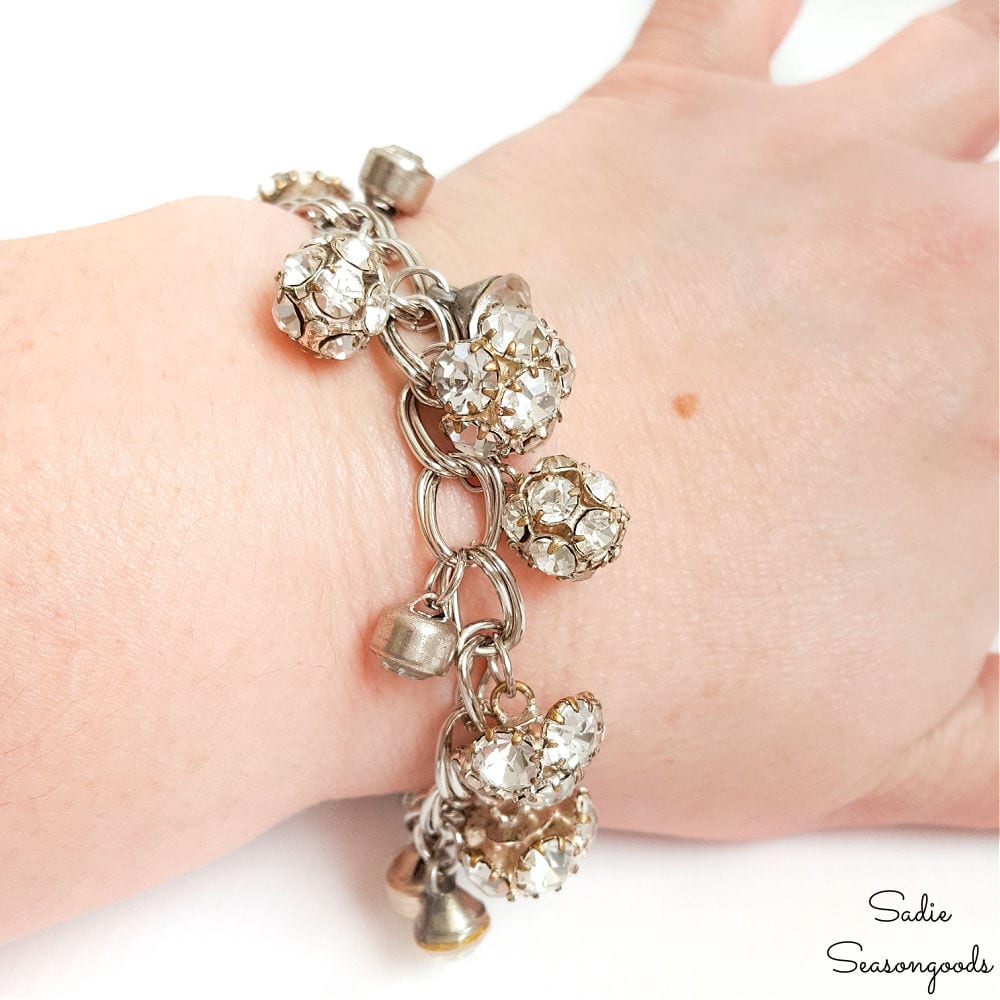
And now my mind is going in all kinds of directions for button jewelry. I wonder what other kinds of rhinestone buttons I could find.
Because I might just need another DIY charm bracelet, or possibly a coordinating necklace.
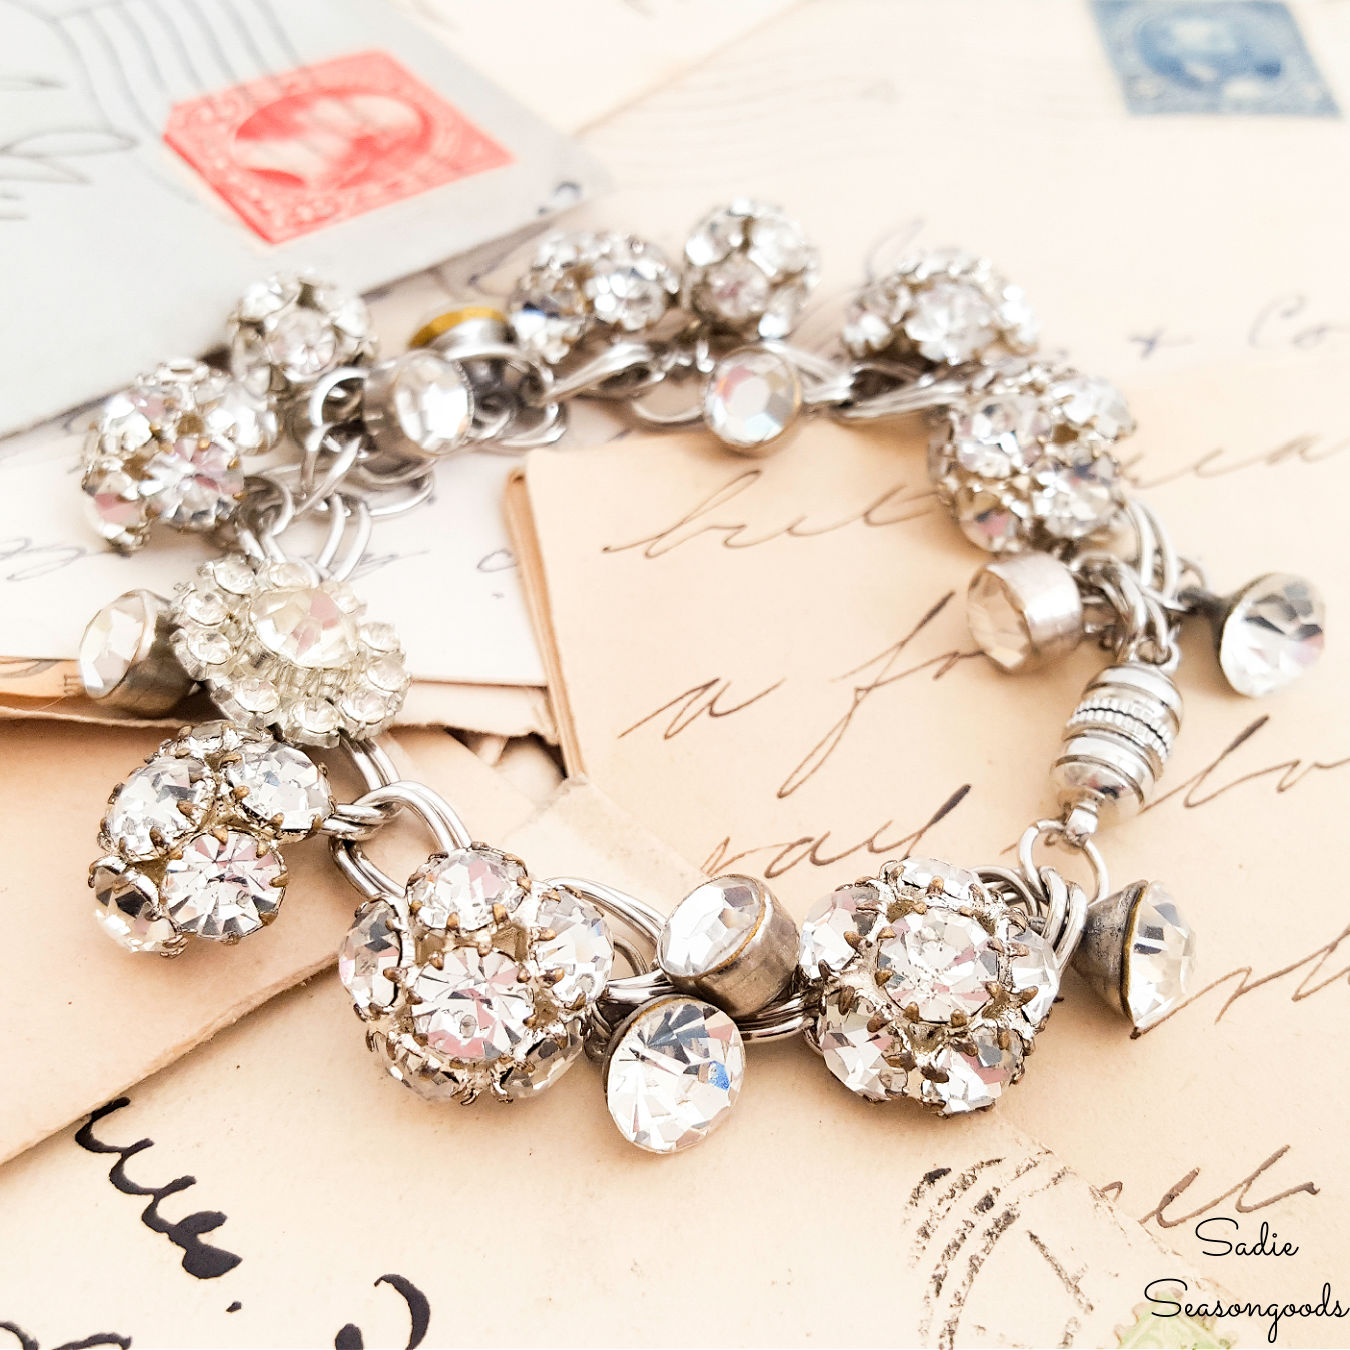
Honestly, though, wouldn’t this be perfect for a bride to wear as wedding jewelry? Something old (buttons), something new (the bracelet), something borrowed (if the buttons came from a family member). And if you add a blue charm or button, something blue!
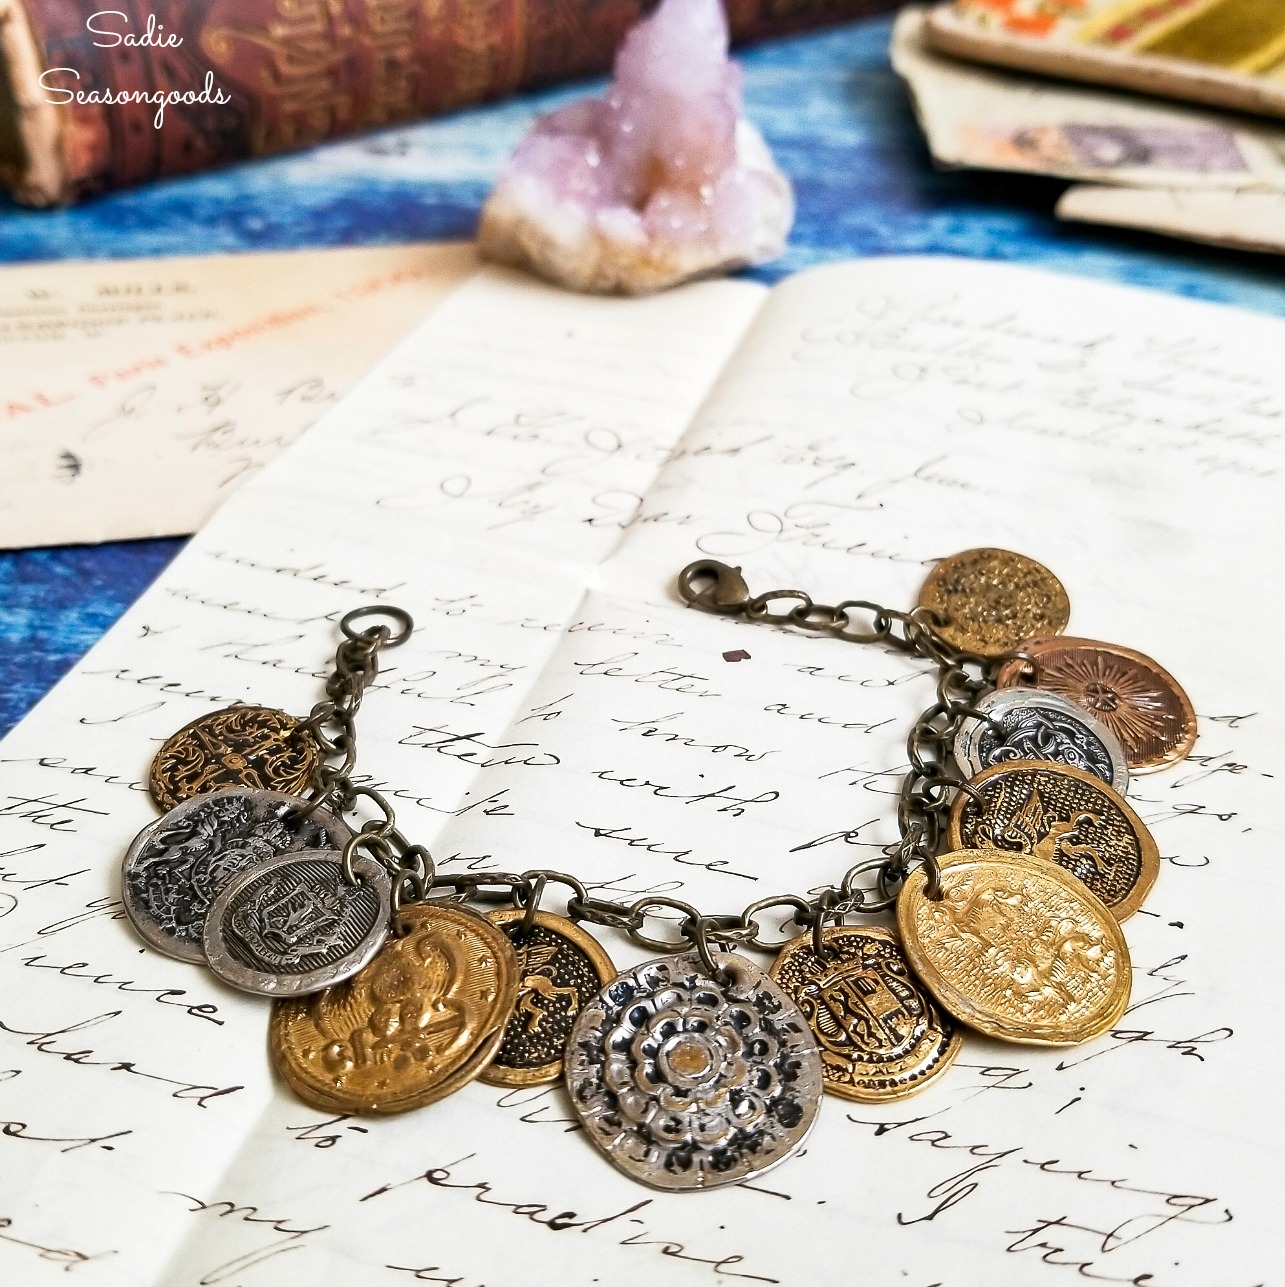
And if you enjoyed this upcycling idea for a DIY charm bracelet, then you’ll love this coin jewelry idea with metal buttons!
Not only that, be sure to check out my latest book, as well! It contains several flannel jewelry projects in it, as well as other flannel accessories, too.
Craft on!
S
Want to be notified when I publish my next upcycling project tutorial?
Join me on Social Media:
PIN ME!
Sarah Ramberg is the owner of Sadie Seasongoods, a website that celebrates all things secondhand. From upcycling ideas and thrifted decor to vintage-centric travel itineraries, Sadie Seasongoods is a one-stop shop for anyone who loves thrifting and approachable repurposing ideas. Sarah is also the author of “Crafting with Flannel” and has been featured in numerous media outlets and magazines.





Wow! That is purrty! I have a bunch of rhinestone buttons stashed away (love my buttons). I can’t wait to try this!
Yay!!! Thank you, Shay!
Hi Sarah I love rhinestone as well. I grab them up when I see them in antique stores and yard sales. I never thought of making a bracelet with the buttons. I can’t wait to get started. Thanks for sharing.
Sharon.
Thanks so much, Sharon!
What a fun,easy project!! I’m into jewelry making but never thought of using buttons this way.love it!
Thanks, Suzy!
Love this idea. I also love vintage rhinestone jewelry. I have quite a few pins from my grandmother and some necklaces. Darn, no buttons though. Guess I will have to be on the look-out for those.
That is gorgeous! I dealt in vintage jewelry for a number of years – buying and selling – and your bracelet easily looks quite vintage and designer made. But of course, as you are a fabulous designer!
Thank you, Carole!
Great idea! I’m going to sort through the old, dented, tin button box my grandma gave me! You are so resourceful and inspirational !
Thanks so much, Patti!
This is so pretty! I actually have a number of this type of button and never thought to do this… I see a project in my future :). Happy New Year to you!
Thank you, Margaret- Happy New Year to you, too!
I love this bracelet!!!! I can’t wait to try and make my own.
Thanks, Kellie!
I would love to see more jewelry redos. Let’s upscale the old outdated stuff. Love your creativity.
Thanks so much, Dana!
I would love to see ankle bracletes. I go to Goodwill all the time and look for clothes with lots of beading and recycle the beads. Way cheaper buying beads.
OMG ! This is awesome…
Thanks, Rosa! And if you wanted to enter the giveaway, don’t forget to click the “I commented” option in the giveaway box. 🙂
Very beautiful and glad you gave a post about it! Would never have thought to do this!!
Thanks for a chance to win the giveaway, I love it! As far as projects go, I have loved everything you have done and look forward to more posts!
Thank you so very much!
I love this…I might have to clean out my stash so I can make one too!!! Thanks for the chance at the giveaway!!!
You are so welcome, Michele!
I would love to see some simple or basic earring ideas. I love sparkly and big but sometimes a simple pair is just right.
Those single stone rhinestone in the conical mountings would make a great bottom stone in drop earrings. I’d get some chain, a couple of faceted beads (per earring ) and a pair of the cone mounted rhinestones I would use some wire to make links of the faceted beads (pass the wire through the bead then make a loop at each end), connect them together with a short length of chain then add another short length of chain before attaching the chain to the conical mounting. I would then add another short length to the topmost faceted beads and attach a pair of earwires. You can control the over all look simply by varying the lengths of chain.
I hope this helps. 🙂
Sounds great, Mike- I don’t have pierced ears and only wear vintage screwback earrings. But your idea sounds lovely! 🙂
I’ve been buying old and broken costume jewelry for years now and some of the screwback ones are made to have dangles attached. It would be just as easy to attach a dangle or dangles to a screwback earring that was designed to have dangles attached. Might require a bit more searching to find them but well worth it. I did a set recently that is a pair of clip earrings for which I made two dangles using three blue faceted Swarovski crystal beads for each dangles. I thought they turned out very well.
I guess I don’t purchase the right jump rings I have a terrible time with the ones I have not getting them closed good.
Love your bracelet
Thank you, Janice- I hope you have better luck next time with the rings…I understand your frustration. And if you wanted to enter the giveaway, don’t forget to click the “I commented” option in the giveaway box. 🙂
I think one mistake some people starting out with jumprings make is to pull the ring open which tends t distort the shape of the ring and makes closing the rings much more difficult. Instead of pulling the ring apart take your pliers (two pair almost a necessity) and grip the jumpring on either side of the opening and instead of pulling open move or twist the ends of the ring in opposite directions ( a turn of each wrist in opposite directions. although I ususally just turn the one side while keeping the other still) but keeping the same relative distance between the ends. Then add the link or whatever you are attaching and carefully bring the two ends of your jumpring back together (another twist of the wrist or wrists in the opposite direction you used to open the jumpring, whichever you find easiest. It is so much more simple than the written explanation. Sorry.
I hope this helps.
So Beautiful love love all of your idea’s
Awww, thanks, Lesa! And if you wanted to enter the giveaway, don’t forget to click the “I commented” option in the giveaway box! 🙂
You always have the best projects.
Thank you so very much. And if you wanted to enter the giveaway, don’t forget to click the “I commented” option in the giveaway box! 🙂
Simply and sparklingly fabulous!
Thanks, Linda! And if you wanted to enter the giveaway, don’t forget to click the “I commented” option in the giveaway box. 🙂
Idk, that’s hard, i love all of your projects!!
Thank you! And if you wanted to enter the giveaway, don’t forget to click the “I commented” option in the giveaway box. 🙂
Absolutely beautiful!
Thank you so much! And if you wanted to enter the giveaway, don’t forget to click the “I commented” option in the giveaway box! 🙂
Very pretty! You always have great ideas!
Thanks, Jan! And if you wanted to enter the giveaway, don’t forget to click the “I commented” option in the giveaway box! 🙂
I’m OK with any project you want to do! You always have some great ideas to share.
Thank you so very much!
Terrific looking bracelet. Thanks for the continued great ideas (and giveaway)!
Thank you! Make sure you click the “I commented” option in the giveaway box! 🙂
would love to see more projects using light globes, fixtures, lamp parts/pieces. your are always wonderful!
Thank you- I will definitely keep an extra eye out for lamp fixture bits! And if you wanted to enter the giveaway, don’t forget to click the “I commented” option in the giveaway box! 🙂
I’m not a bracelet wearer, but i might have to change my attitude! That is gorgeous!
Thanks, Nancy! And if you wanted to enter the giveaway, don’t forget to click the “I commented” option in the giveaway box! 🙂
Oh, that is such a darling “blingy” bracelet! It would sparkle up anyone’s day…..Love, love, love it.
[email protected]
Thank you so very much! And if you wanted to enter the giveaway, don’t forget to click the “I commented” option in the giveaway box! 🙂
another piece of gorgeous from the brain of sarah love it xx
Thank you!! And if you wanted to enter the giveaway, don’t forget to click the “I commented” option in the giveaway box! 🙂
THIS SURE MAKES ME WANT TO CHECK OUT MY MOM’S OLD BUTTON BOX!! GORGEOUS AND SO EASY TO DO!!!
Thank you so very much! And if you wanted to enter the giveaway, don’t forget to click the “I commented” option in the giveaway box! 🙂
I think I can trust you to follow your own creativity with the projects you choose for 2017. You are doing spectacularly so far, this bracelet is super cute and so easy. What a great idea!
Beautiful bracelet! What a great idea for those types of buttons. I’m going to see if I have enough to make one!
Thank you so much, Maria!
Sarah, that is the coolest bracelet! I love, love, love the sparkley buttons. I haven’t visited your blog before, but I’m signing up right now! I need to keep up with what you are up to, girl! I really want to make one of these bracelets, but I’m going to have to make vintage rhinestone button hunting a priority for the next year, I guess!
I will be anxious to see more posts and follow your adventures! Happy New Year; I hope it’s starting off fabulously for you.
Thank you so much, Naomi- and WELCOME!!! I’m so glad you’re here…this is a great post for you to take a gander at: http://www.sadieseasongoods.com/favorite-sadie-seasongoods-projects-2016/ . It recaps last year’s most popular projects, so you’ll get a good idea of the kind of posts to expect. 🙂
Thanks, Sarah, I’ll take a look!
I LovLovLov it!
Theresa
Thanks, Theresa!!
Thank you so much, Theresa!!
I love to use buttons this way! It’s wonderful to see that you used the shank and not cut them away!
Thanks so much!!
It’s so pretty and oh so glam, Sarah and I don’t even wear jewelry but I’d wear that on special occasions for sure.
Thank you so very much, Marie! Happy New Year to you!
I have only just started following your blog…but the buttons bring to mind…what other kids of non-traditional items can you turn into jewelry..I would love to see more of that!
Welcome to my blog!!! All of my projects are repurposed or upcycled…but if you’re specifically interested in jewelry, here are a few links to check out:
http://www.sadieseasongoods.com/a-swoon-for-a-spoon-cameo-pendants/
http://www.sadieseasongoods.com/pulley-pendants-steampunks-softer-side/
http://www.sadieseasongoods.com/coined-metal-button-jewelry/
http://www.sadieseasongoods.com/can-you-handle-it-wooden-pendants-from-vintage-tennis-rackets/
http://www.sadieseasongoods.com/reclaimed-furniture-applique-brooches/
Thank you for this giveaway. The earrings and all the jewelry are lovely. I would like to see some clothes patterns ,some magazine and book recommendations.
Marilyn
Thanks, Marilyn!
Love this! I will now be on the hunt for shank buttons to make my own.
This is fabulous! My mom loves vintage jewelry. I’ll be scoping out rhinestone buttons now to see if I can make her something similar! Thanks for the giveaway!
Thanks, Annette- and you are so very welcome!
This is SO gorgeous!! What a great way to save all those pretty buttons! 🙂
Thank you, Miss Thang!!!
I’ve always been intimidated by jewelry making, but I’m enamored with your sparkly bracelet. I may be enamored enough to get over my fear. Thanks for sharing at the #ThisIsHowWeRoll LInk Party.
I think you’ll love it!!! This one is so easy once you collect the buttons…I promise, nothing to be intimidated of!
I actually do prefer to wear jewelry made in rhinestones instead of diamonds. That way I don’t have to stress about losing or damaging anything. Being a total klutz, that is important! Love your bracelet.
RIGHT?? I agree!! 🙂
I would like to learn to stencil. I saw a picture of some stenciling done on an archway wall.
I’m learning that myself, Audrey! It’s a wee bit addicting… 😉
Every girl needs a little bling in her life and this bracelet does that. Gorgeous
Thank you so much, Mary!
Great idea! I am searching in my button collection for sure now!
p.s. I would like to see anything upcycled, revamped in your upcoming posts.
That’s what my entire blog is dedicated to, Susan- all repurposed/upcycled projects that are smaller (i.e., not furniture). I hope you’ll take a look at some of my posts!
Sarah – not only is this beautiful, the instructions are really easy to follow. Thanks for sharing on the Pleasures of the NW’s DIY party!
Thank you so very much, Helen!
Ooo, it’s pretty! I have a few buttons like this but would need to collect a few more for a bracelet. I’ve seen soemthing similar where someone bend earring posts round too, maybe a combination of earrings and buttons might work…. Pinning!
What an awesome bracelet, time to start hunting for vintage buttons, ahh the thrill of the hunt! Thanks for sharing!
I’m so glad you like it, Kaycee!
This is easily my most favorite project post in a long long time. Maybe it’s because I have a jar of buttons and it looks completely doable for a novice? Maybe it’s because it’s so darn pretty. Thanks for posting! … wouldn’t these make great Christmas gifts next year?
TOTALLY would make awesome Christmas gifts!!!
Sarah, I popped over from Petticoat Junktion for the other giveaway and thought I’d look through some of your other posts. This one is great because I have rhinestone buttons I’d love to do something with. Cute idea! Since I like to make repurposed jewelry, I’ll make one of these, too. Thanks for the inspiration! And a giveaway here as well ! Just under the wire for those sweet earrings, thank you for that! And what I would like to see… since I will now have to subscribe…. is more jewelry ideas !
Welcome, Patty!!! I adore Petticoat Junktion- so glad you came on over!
Oh Sarah, your bracelet is beautiful. I;m sorting my vintage buttons ASAP to see if I have enough rhinestone buttons to make a bracelet. Thank you so much for sharing your wonderful bracelet with us at Vintage Charm. You never disappoint. sb
Thank you so much, Sharon! It’s so easy to make and yet the results are, well, stunning! I think you’ll love yours. 🙂
Thank you for sharing at the Snickerdoodle Create~Bake~Make link party too! I am featuring your bracelet at the party today.
Gorgeous Sarah! I don’t wear jewelry too often but, I’d definitely wear something like this! Thanks for sharing at Funtastic Friday! Pinning 😉
Love your bracelet and the idea
Thank you, Cheryl!
LOVE it!
Thank you so very much!
Thank you for these beautiful earings…I cannot believe I won. They are exactly my style. I have replied to your email 🙂
Congrats, Jodi!!! They should be on their way. 🙂
I am so excited!! 🙂
So pretty! This looks like a great DIY jewelry project. Thanks for the tutorial.
This is gorgeous! I definitely want to make one now. Where did you collect most of your buttons from?
I bought quite a few on Etsy!
Hi Sarah! Just wanted to let you know that I’m featuring your beautiful bracelet tomorrow at Vintage Charm 🙂
Thank you so very much, Diana!
Lovely bracelet. So creative. Love the earrings also
Thank you, Cookie!
Aww…so pretty! 🙂
I would love for you to share this with my Facebook Group for recipes, crafts, tips, and tricks: https://www.facebook.com/groups/pluckyrecipescraftstips/
Thanks for joining Cooking and Crafting with J & J!
So cute and pretty! Love the idea of using buttons!
WOW! That is darn gorgeous! I’ve got to start looking for more shank buttons. I’m with you – vintage rhinestones over diamonds any day
Thank you so very much, Cathy!
What a gorgeous bracelet. It looks like a vintage treasure from an estate sale.Love it!
Thank you so much, Heidi!
What a fun way to use the rhinestone buttons! Very creative, Sadie! Thanks for sharing at Celebrate Your Story!
I love love love this idea!! I have some sparkly buttons that I may just have to copy this!
Thanks, Jen!
This is so beautiful, I never would have guess that this was made out of buttons.
Thank you, Toni- and thank you for the feature!
Just beautiful!!! Love this to bits Sarah!
Thank you so much, Sam- and thank you for the feature, too!
This is absolutely stunning!! What a gorgeous repurposed project! Thanks so much for sharing your project with us at Merry Monday this week!
Thank you so very much!!
Ooh! I love this idea, Sarah! I took apart some old jewelry that was my grandmother’s and my great aunt’s to make a necklace for my wedding. A charm bracelet would be an awesome way to wear some of their jewelry every day! Pinned and sharing! Thank you for joining us at Family Joy Blog Link-Up Party. I hope you will join our next party starting Sunday at noon EST.
Thank you so very much, Cristina!!
Love, love your bracelet!! I have been collecting rhinestone buttons for a long while. Can’t wait to make on of these!!
Thanks, Terry!
This project is so awesome. I’ve never even thought about doing a jewelry project, but you’ve got me thinking seriously about doing it. I have tons of rhinestone pieces I inherited from my mother. That’s the first place I’m going to “shop”. Thanks for sharing.
Thank you so much!!!
Hi, your blog is so cute and I would like to subscribe, if possible. I looked on the pages but couldn’t find the spot. Thank you, if possible. Otherwise, I’ll continue to read. Thanks!
Hi, Melody- I tried to subscribe your email address, and it says you had opted out of subscription already. Sorry I couldn’t be of more help!
Hi Sarah, gorgeous bracelet and an excellent tutorial. Thanks 🙂
Thank you, Pauline!
Hi Sarah, such a wonderful vintage charm bracelet. You have inspired by to try it myself 🙂
Thank you, Laura!
What a great idea and super pretty. I love this!
Thank you, Sheila!! :*
What a great idea! I’ve been sorting my button collection and have some vintage rhinestone that I love. I also have some single vintage earrings that I bet I could alter to work like the buttons. Thanks for the inspiration!
You’re so very welcome, Sylvia!!
Thank you for the inspiration, I treasure my old buttons.
You are very welcome, Sue!
Oh that is so cute! I need to get a hold of my moms buttons and see if she has any like these. Love it!
I Love this so very much! I collect all sorts of buttons that I tell myself I’ll use in crafts I make for gifts, but I have a hard time parting with any button. LOL! I think I might make one of these bracelets for a gift for myself. 🙂